20+ Easy Junk Journal Embellishments To Make Today
From paper and fabric clusters to altered paperclips, dangles and spine tassels, there are so many gorgeous junk journal embellishments you can try making. And the best bit? Many of them are super quick and easy!
I’ve officially lost count of how many embellishments I’ve made for my journals by now. But if I had to share my absolute favourite ideas, this list of over 20 easy junk journal embellishments would probably be it.
I hope you find this blog post (and the video tutorials linked throughout) helpful and inspiring. Commence prettying up your journals in 3, 2, 1…
Psst! If you’re also after ideas on how to use your junk journal embellishments, then check out this list!
Easy Junk Journal Embellishments: 20+ Examples & Tutorials
Altered paperclips
You can make altered paperclip embellishments in various ways.
If you don’t know the lingo yet, then altered paperclips are decorated or embellished paperclips that still serve their purpose as paperclips. But they look much more decorative.
You could decorate your paperclips with ribbons, charms and fabrics for a simple and practical junk journal embellishment.
You can even “hide” your paperclips so that the focus is on the pretty embellishment you’ve created rather than the paperclip itself.
The easiest way to do this is to wrap the paperclip up inside some scrap cardstock, which you can then decorate with a word sticker or even hang a charm from the paperclip. Here’s my video to show you how I made this kind of altered paperclip.

You can even turn your paperclips into pockets, which I showed in this video using some circle cutouts from a Stamperia paper pad.

Mandy from SunflowersAndDors also has a great round-up video to show you different altered paperclip ideas, which you can watch here.
And for even more altered paperclip ideas, here are some more of my videos:
READ NEXT: Junk Journal Definitions | A-Z Junk Journal Glossary For Beginners
Paper junk journal clusters
Clusters are another easy junk journal embellishment idea – and one of the most popular ones, too!
You can make them out of practically anything, but one of my favourite ways to make them is by using vintage bus tickets. They look really cool and will suit most themes.
Grab an old bus ticket or those little tickets you get from arcades, glue a little fussy cut, sticker, label or word onto it – and hey presto! You have a quick and easy junk journal cluster!
Here are some I made by decoupaging arcade tickets with napkins (and here’s how I made them).
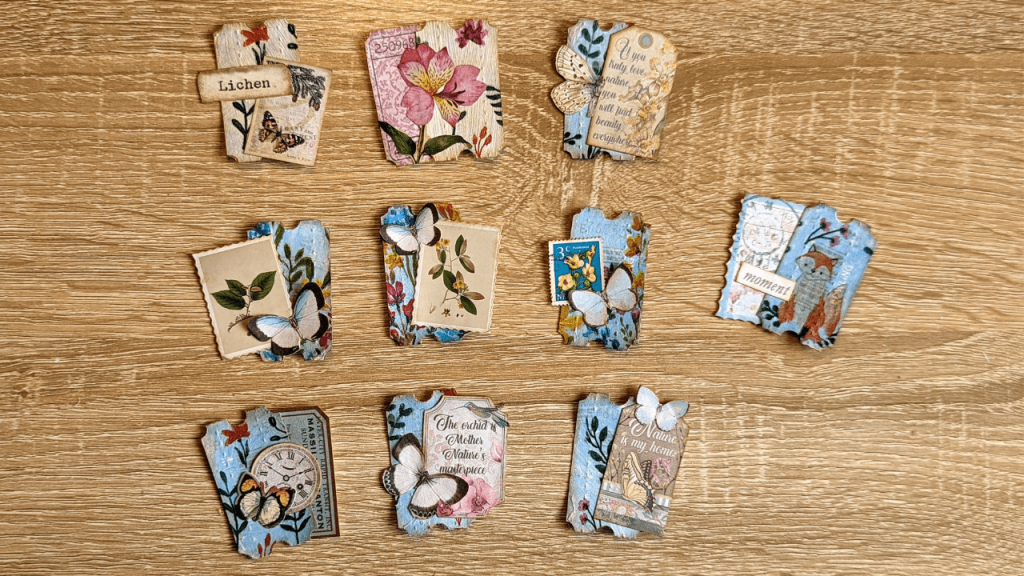
Since then, I’ve also used Tim Holtz bingo cards to make some botanical junk journal clusters. Here’s my process video for those.

Or why not punch some large circles from your leftover cardstock and make some scrappy circle clusters like these?
Speaking of circles, I just love these chocolate wrapper clusters I made recently for my woodland journals. The base is circular Ferrero Rocher wrappers with a few scraps of fabric and some fussy cuts glued on top. Easy peasy and they look so unique – like little woodland jewels!

If you’re after even more ideas, then I’ve made all sorts of paper junk journal clusters on video. Here’s my playlist on YouTube for you to browse through.
Top Tip: You might find it easier to make paper clusters by making some bases first. Here’s a video to show you what I mean and here’s a video to show you how I decorated the bases. These are some of the fastest clusters I’ve ever made so I’ll definitely do them this way again.
READ NEXT: How To Make A Junk Journal Cover With Sweet Wrappers & Lace
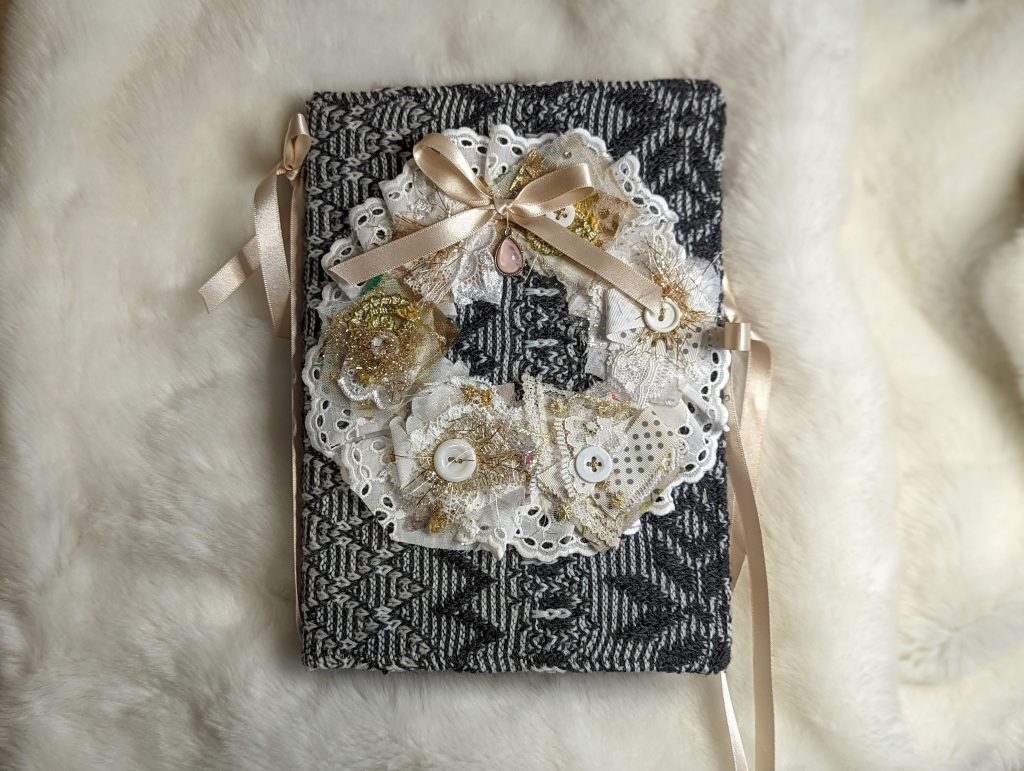
Fabric junk journal clusters
You can also use scraps of fabric to make your junk journal clusters. What I love most about these is how soft and textural they feel.
All you need is a few scraps of fabric or lace and either a button or a brad to hold all the layers together. Easy peasy!
In this video, I chatted away about my recent travels while making some festive junk journal clusters (which I later turned into a shabby wreath for one of my journal covers).
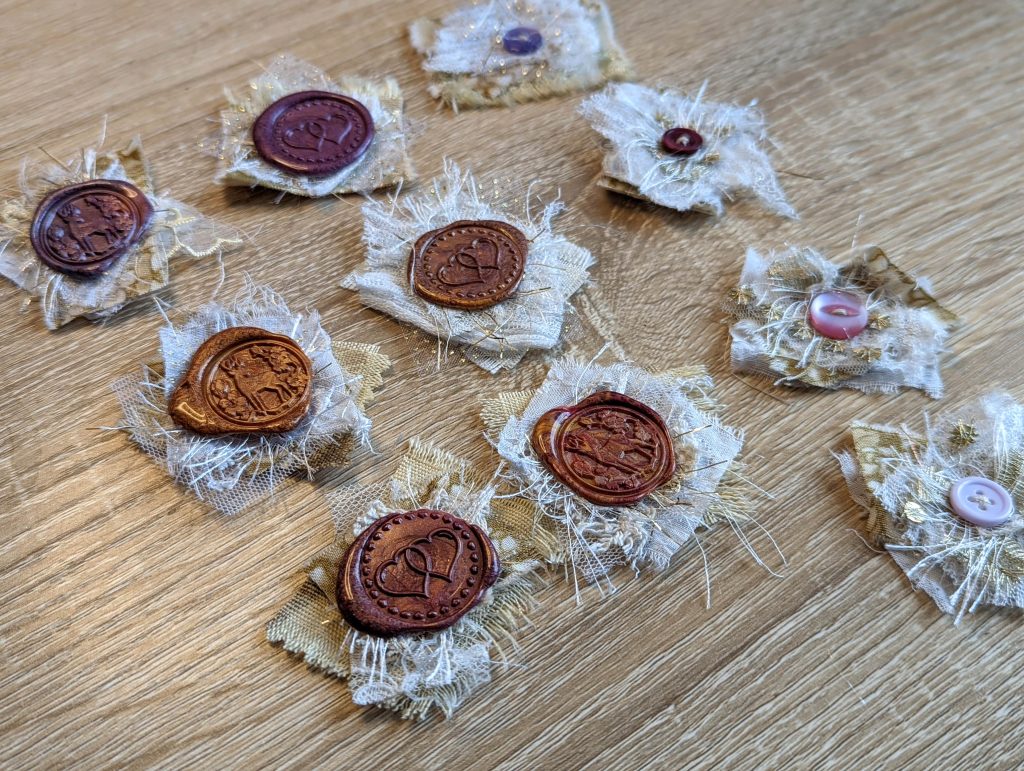
Of course, you don’t just have to use buttons or brads to decorate them. How about stapling the layers together and glueing a die-cut heart shape on top like I did with these?
Or – if you have a wax seal kit – you could even glue a wax seal on top of your fabric clusters. They look really fancy and even have a vintage vibe to them. Here’s my video to show you how to make them.
READ NEXT: Beautiful & Easy DIY Wall Hanging Using Fabric Scraps [Video]
Fabric ruffles
If you make fabric journal covers, you might find you have random strips of fabric left over afterwards.
Rather than throw them away, you could use them to make fabric ruffles, which look wonderful down the side of a page. Or you can use them to decorate pockets.
I use my sewing machine to make my fabric ruffles (here’s a handy tutorial from Makincrafts if you’ve never made them before). But you can also stitch them by hand like Tina from Shabbydabbydoodah does in this video.
Top Tip: While you can sew your ruffles straight onto whatever you’re decorating, I find it easier to make my ruffles and then glue them onto my pages using fabric glue.
READ NEXT: 10 Junk Journal Page Ideas To Inspire You
Fabric page edges
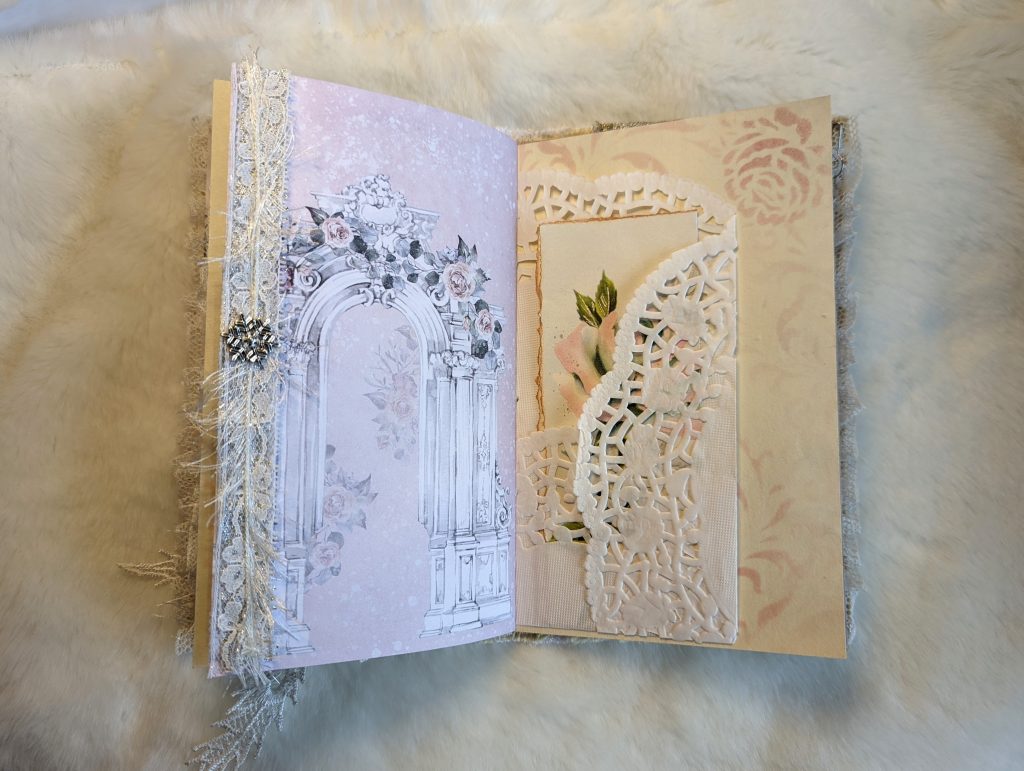
You can also make some pretty page edges using fabric. I made some for my winter wedding journal by sewing layers of lace, ribbon and fluffy eyelash trim together.
I then hand-stitched a snowflake charm in the middle, which looked so pretty. Here’s my process video if you’d like to see how I made it.
Fabric flips

Alternatively, you can use fabric to decorate your journal pages in other ways.
One of the easiest things you can do (which also adds an interactive element to your journal) is to attach a simple fabric flip to your page.
All you need to do is cut (or rip!) some fabric to fit your journal page and then glue the top edge of it onto the page to create your flip-up. You could also attach some lace (or maybe even a ruffle!) to the top of it to fancy it up a bit.
Here’s my video to show you how I mass-made a whole bunch of fabric flips to use up some scrap fabric I had lying around.
READ NEXT: 14 Creative Things To Do In A Journal Or Notebook
Snippet strips & rolls
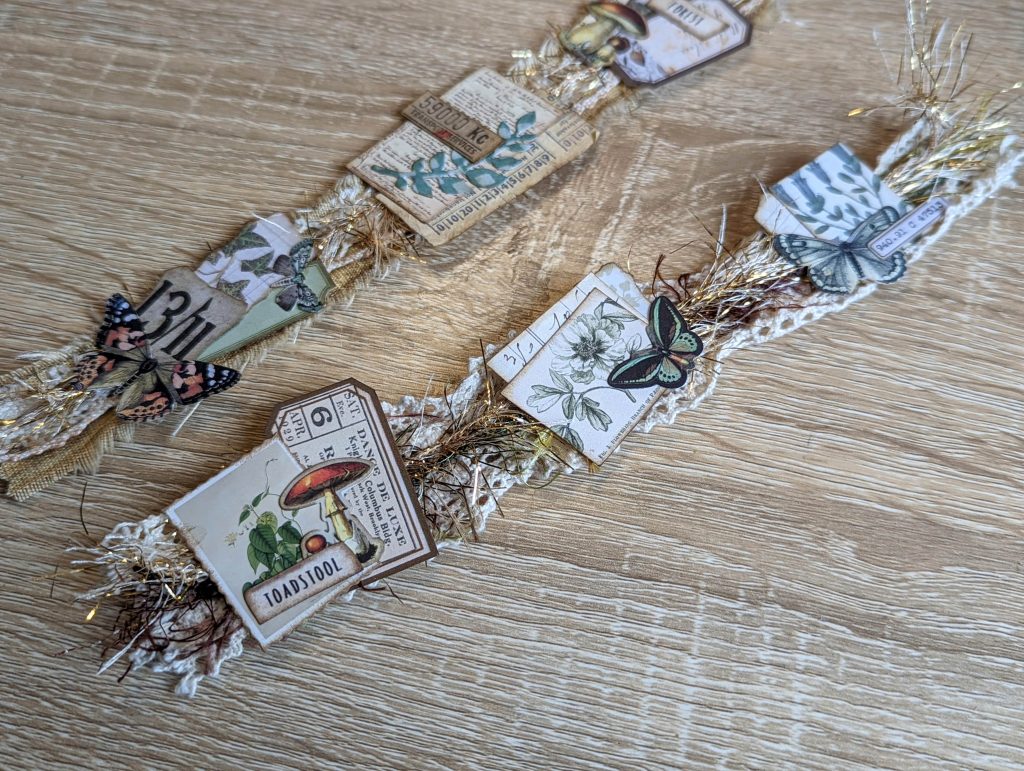
If you have lots of scrap fabric, then you’ll probably benefit from making snippet strips and rolls out of them.
Snippets are like clusters. But the main difference is that you make a long strip or roll of them, which you can then “snip” into when you’re ready to use them later – either as page embellishments or to decorate pockets and other ephemera.
Here are some of my videos to show you how I make mine:
- Botanical Snippet Strips
- Cosy Winter Snippet Strips
- Pastel Winter Snippet Strips
- Woodland Snippet Strips
You can even use snippet rolls to decorate journal covers like I did when I upcycled a fold-out writing set, or as journal closures. Tina from Shabbydabbydoodah did this by attaching a clip fastening to her snippet roll.
READ NEXT: 21 Junk Journal Cover Ideas To Inspire You

Scrap fabric & lace dangles
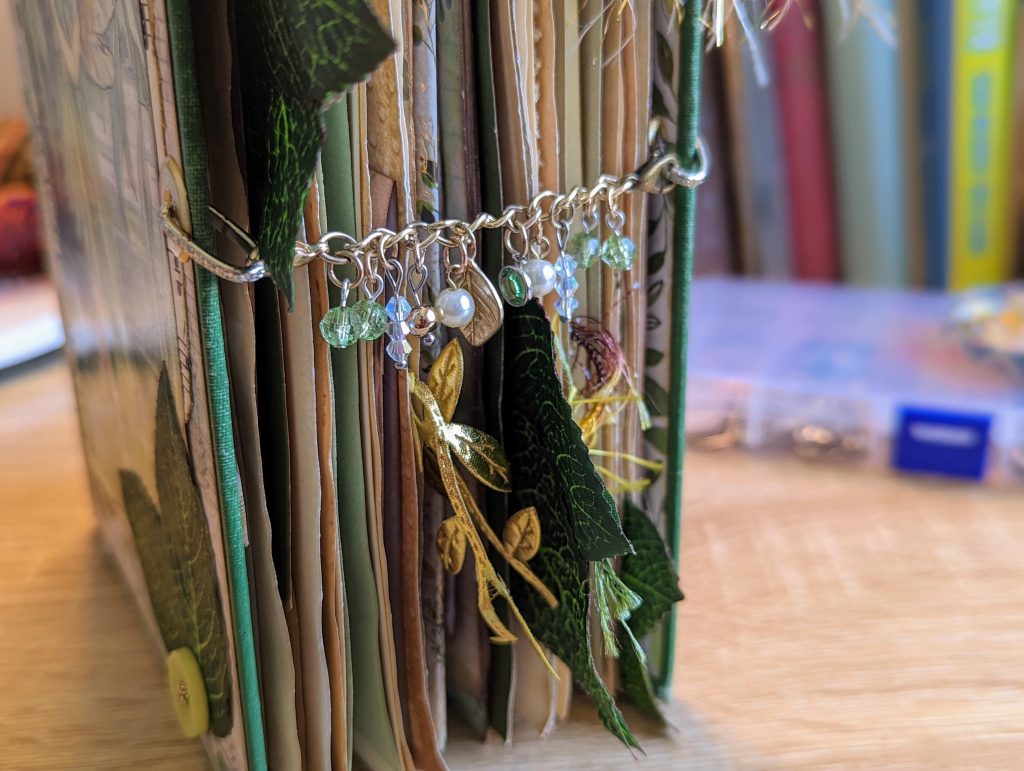
You can also use fabric and lace to create your very own junk journal dangles. These look so lovely when hanging from page tabs or on the front of your journal and they’re really easy to make.
All you need is some small strips of scrap fabric and lace, which you can thread onto a bulb pin. You could even add some pretty finishing touches with little bows or words and labels. Here are some I made to go with my Edith Holden journals.

I also made something similar for my “Cosy Winter” journals. But instead of using a bulb pin, I used a ball chain and a snowflake charm to get a different kind of look. Here’s my process video if you’d to make this variation.

Broken jewellery or bead dangles
Speaking of dangles, the most popular way to make these (when it comes to junk journals anyway) is to use beads or pieces of broken jewellery.
You could knot some beads or charms onto string or cord for a simple yet pretty dangle. You could even just dangle pieces of broken jewellery from your pages or ephemera using bulb pins. This is what I did when I made my first journal.
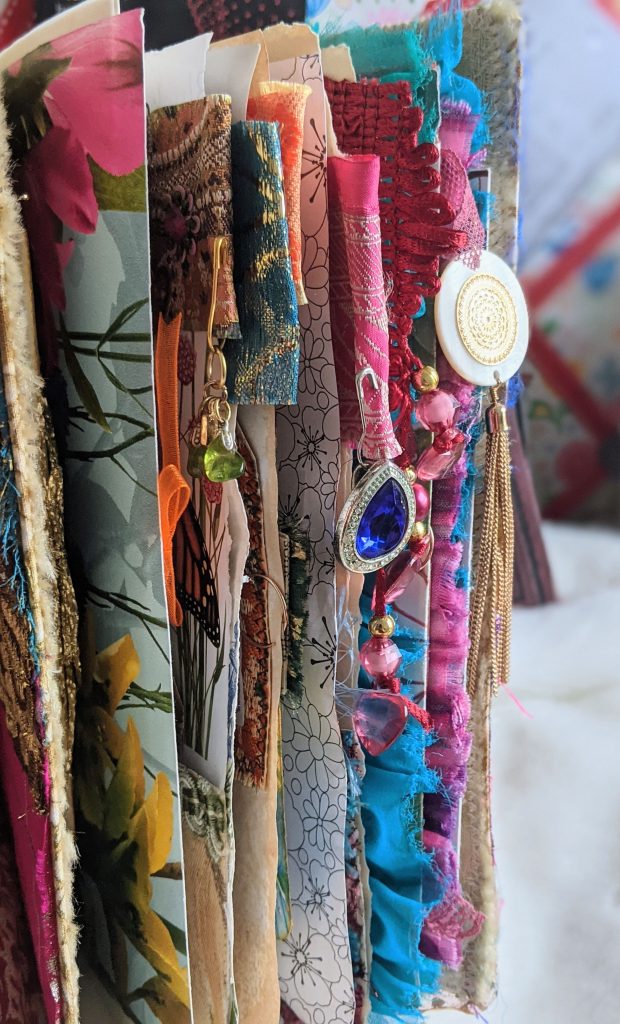
Or, if you want to challenge yourself, then you can make some pretty dangles completely from scratch. Here’s my tutorial video to show you how I made some simple bead dangles.
For this kind of dangle, you’ll need some extra supplies such as jewellery pliers and either ball or loop pins. But they can end up looking quite professional when you’re finished.

You can even use your dangles to create a unique journal closure like I did for my “Enchanted Woodland” junk journal.
Aside from broken jewellery and beads, you could even use buttons to make some fun little dangles.
I made these by threading some scraps of paper onto a bulb pin, followed by a button. I then glued an inspirational word or phrase onto the top piece of paper. Easy peasy!
Junk journal tassels and spine jewellery
Speaking of dangles, why not make a large one to hang on the spine of your journal?
This is called a junk journal tassel, boho tassel or just simply spine jewellery. They look stunning when your journal is sitting on the shelf, and once again, they’re easy to make.
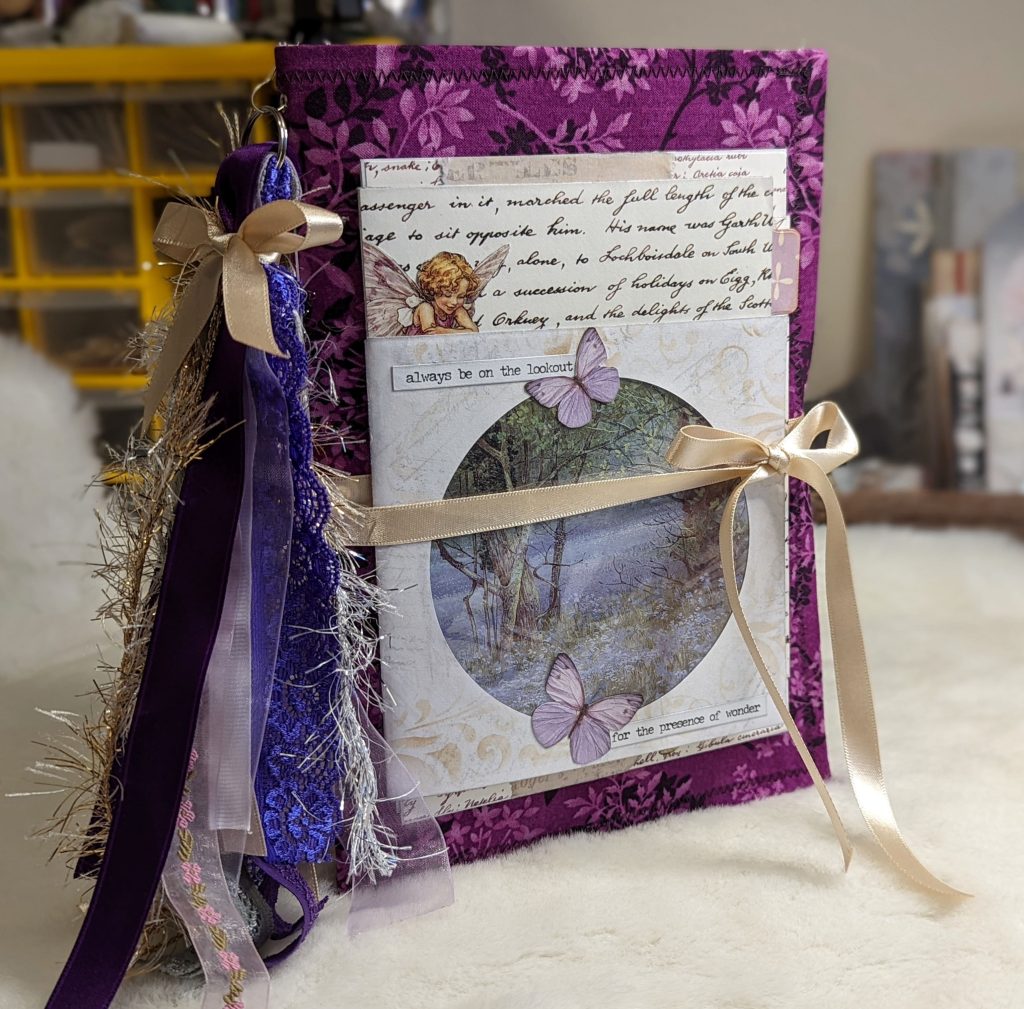
People make them in different ways. But the simplest way I’ve found is to thread 15-inch lengths of fabric and lace onto a large ring (such as a keyring) and tie them in place with some cord or ribbon. You can then finish off your tassel with a pretty bow, beads and charms. Check out my full tutorial here >>
In the photo above, you’ll see the tassel I made for my purple fairy journal. Below, is the festive version I made for one of my Little Golden Book journals. I used the exact same method detailed in my tutorial to make both tassels, so it just goes to show how you can change them up to suit any colour, theme or style.

READ NEXT: How To Make Junk Journal Tassels In Under 15 Minutes!
Tag bookmark with chain embellishment
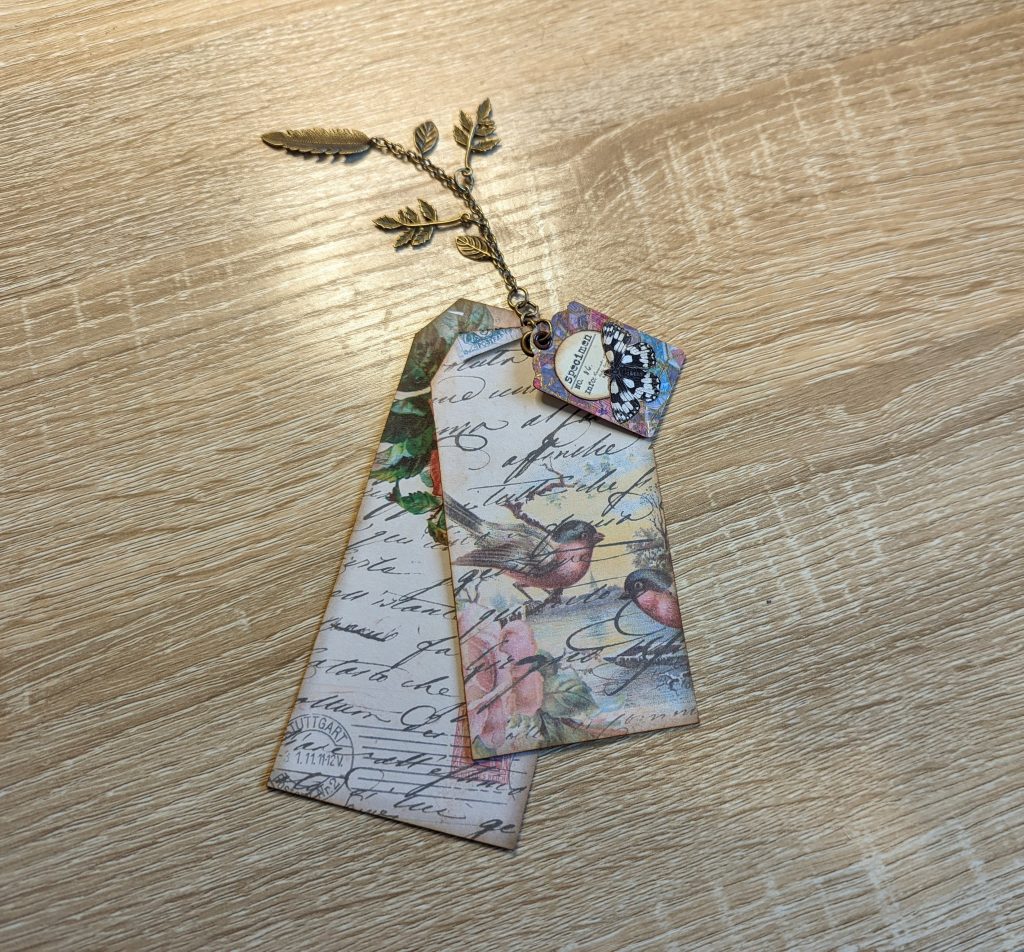
Alternatively, you could have some of your ephemera double up as bling or journal jewellery for a unique spin on junk journal embellishments.
One easy way to do this is to attach a long chain of charms to one of your tags, so that this can stick out of the journal like a bookmark. Here’s a video to show you how I made mine.
READ NEXT: 15 Junk Journal Tags & Journal Cards To Inspire You
DIY journal charms
If you have lots of scrap paper or cardstock left over from your projects (don’t we all?! LOL), then you can even make your own DIY journal charms out of them.

Simply punch some circles from your scraps, glue them on top of each other to make a thicker wedge and apply ModPodge or Matte Medium to firm them up.
Once they’re dry, you can rub some paint along the edges of your charms to “hide” the layers and add an eyelet so you can dangle them from some chain or a bulb pin. Here’s my process video to show you how I made mine.
While there are a few steps involved, this doesn’t feel like a pain if you make a whole bunch together. I must have made at least 20 in one go!
Twinchie sliders

Here’s another creative junk journal embellishment idea: twinchie sliders! Or really, any kind of slider embellishment would work fine.
All you need to do is glue a length of ribbon in between two layers – ideally something decorative – so that the embellishment can slide along the ribbon.
I used “twinchies” (2×2-inch square embellishments) to decorate some festive ribbon. They were fun and interesting pocket embellishments for my Christmas journals so I’ll definitely make them again. Here’s my tutorial video to show you exactly how I made them.
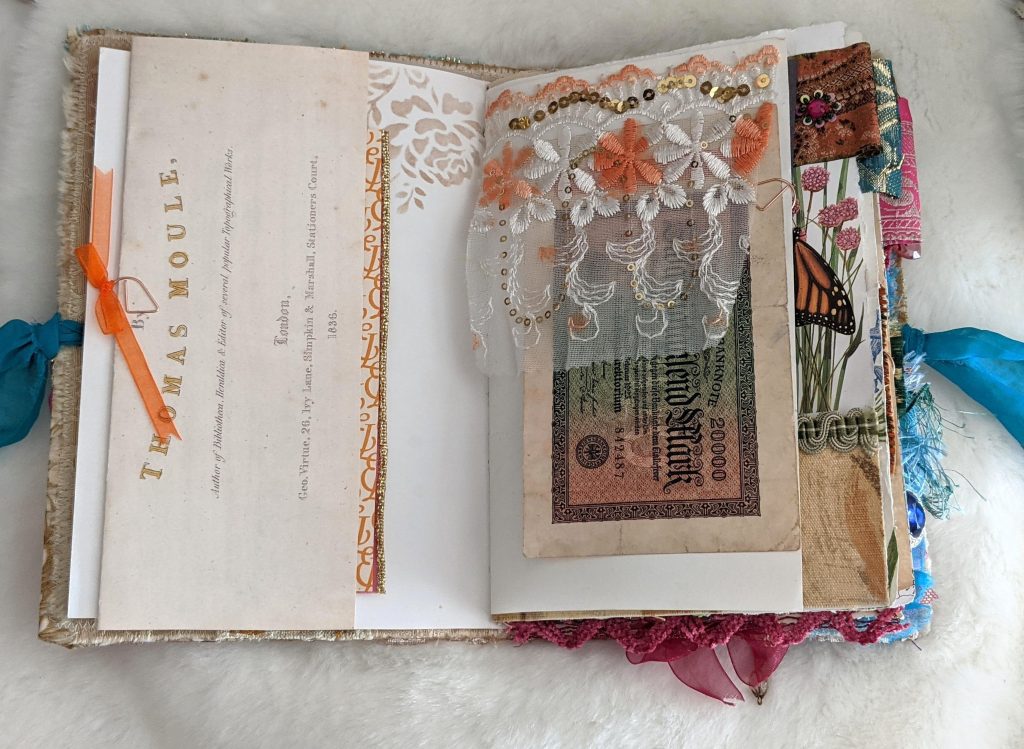
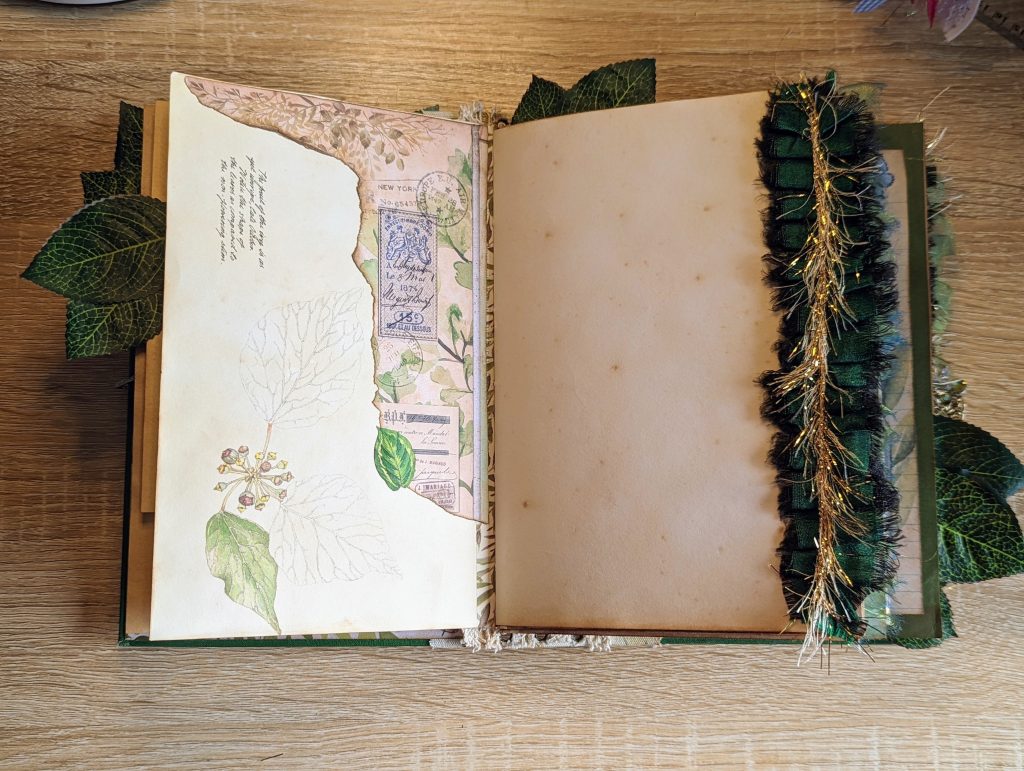
Pressed leaf cover embellishments
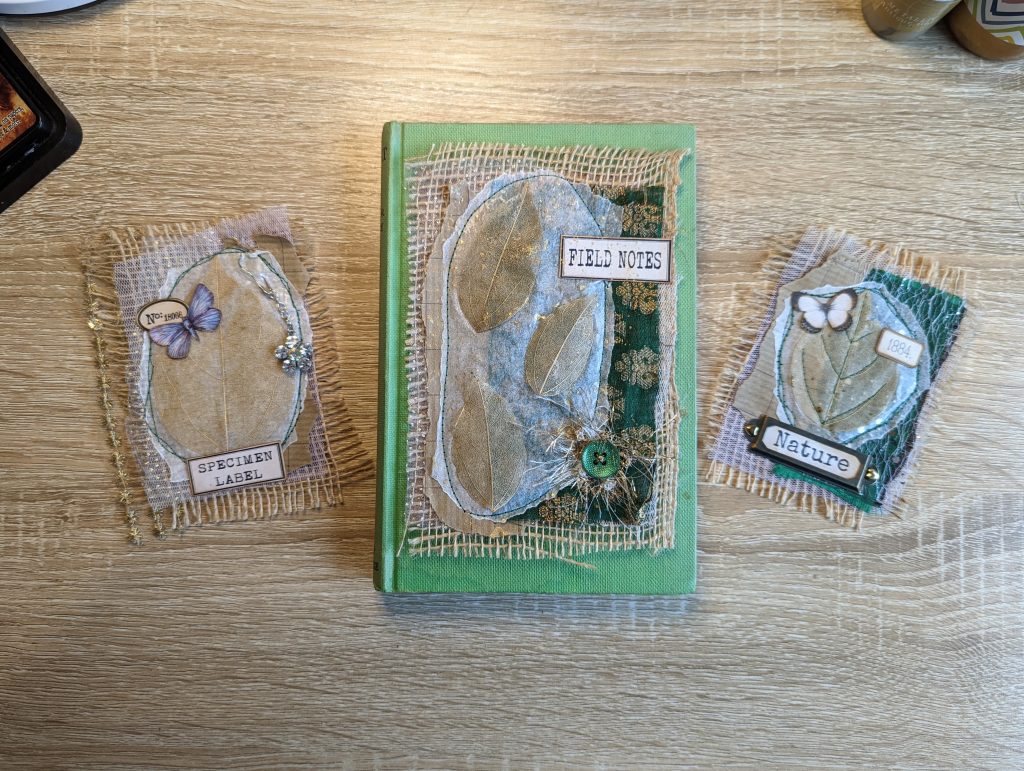
If you like making botanical journals (hey, me too!), then you might enjoy decorating your journal covers with pressed leaf embellishments.
I first saw Tatty Treasure make something like this (here’s her video), so I made my own versions. I didn’t have any pressed leaves to hand at the time so I used skeleton leaves.
Essentially, they’re just giant fabric clusters that can be used on journal covers. Here’s my video if you’d like to watch along.
READ NEXT: How To Keep Pressed Flowers In A Journal (7 Easy Ideas To Try!)
Bird’s nest embellishments
Finally, if you’re into bird-themed journals, then you might also enjoy some bird’s nest embellishments I made recently.

My first batch (here’s the video) involved punching 2.5-inch circles out of some Easter Egg packaging that had a nest-like pattern on it. I then added some brown sewing machine thread, hessian and bird fussy cuts on top to decorate them.
Since then, I also tried making a bird’s nest embellishment for my ‘Through The Seasons’ altered book journal. I used a large circle again; this time with some lace, gold eyelash trim and fussy cuts to decorate it.
I think it turned out so effective! This one even doubles up as a little tuck spot. Here’s my video to show you exactly what I did.
READ NEXT: Altered Book Pages – 11 Easy & Beautiful Page Ideas To Inspire You!
Discover More Creative Journal Ideas
- 21 Junk Journal Cover Ideas To Inspire You
- 10 Junk Journal Page Ideas To Inspire You
- 15 Junk Journal Tags & Journal Cards To Inspire You
- 10 Easy Junk Journal Pockets: Ideas & Tutorials
- Easy Junk Journal Embellishments: 20+ Examples & Tutorials
- 8 Ways To Use Junk Journal Embellishments (With Examples)
- 10 Junk Journal Binding Ideas & Tutorials To Inspire You
- 19 Hidden Journaling Ideas To Keep Your Writing Private
- 35+ Types Of Junk Journals You Can Try Making
- 14 Creative Things To Do In A Journal Or Notebook
- How To Keep Pressed Flowers In A Journal (7 Easy Ideas To Try!)
- 17 Fun & Festive Christmas Junk Journal Ideas
- 52 Junk Journal Prompts To Help You Write In Your Junk Journal
- Join My Free Facebook Group
- Check Out The Mahalo Clubhouse Membership
If you’re after even more ideas, then you might also enjoy browsing through my junk journal embellishments playlist on YouTube.
Did you get some inspiration from this list of DIY junk journal embellishments? Why not pin or bookmark this blog post now, so you can refer back to my ideas later?

Junk Journal Toolkit
📦 What do I need to get started?
If you’ve got paper, glue, scissors and something to bind your pages with (like a needle, thread and an awl or pokey tool), you’re good to go! Check out my essentials vs. nice-to-have supply list for more info.
🤯 I’m overwhelmed by tutorials and ideas. Where should I start?
Start with my free Mini Junk Journal Masterclass. It walks you through the process step-by-step. Even though it focuses on a mini journal, the same tips apply to any size journal.
❓ I don’t understand the terminology. Can you help?
Absolutely! My A–Z Junk Journal Glossary breaks down all those confusing terms and acronyms. Jargon be gone!
🪡 How do you keep your binding neat?
I use my bookbinding cradle to line up my holes and avoid punching too far through the pages. Smaller holes give a neater and more secure binding, and I use this thin upholstery thread for a cleaner finish.
🧵 Do I need a sewing machine?
Not necessarily! A basic sewing machine is helpful for making fabric-covered journals, but strong fabric glue can work just as well. If you stick to paper-based journals or folios, you don’t need one at all. I like the sewn look and making fabric-based journals, so I personally use a simple machine (similar to this) that’s lasted me over 10 years – it’s a trusty part of my toolkit.
🖼️ What digital papers do you use?
I use a mix of my own designs and other favourites. You can see examples here. New to digitals? Check out my mega bundle for a big saving on some of my designs or sign up for my Mahalo Clubhouse membership to get brand new digitals sent to you every month.
📜 What’s the best paper for printing digitals?
I use this 100 GSM Presentation Paper for vibrant and high-quality prints.
🖨️ What printer do you recommend?
I love my Epson Ecotank. It’s affordable, reliable and the ink lasts ages. I used to spend £30 a month on ink – now I refill just once or twice a year for under £30. Check out my detailed review of EcoTank printers to see how much you could save!
🖇️ What glues do you use?
My go-tos are Collall All Purpose, Cosmic Shimmer and Beacon 3-in-1. Here’s how I use each one.
📖 What books are best for junk journaling?
I love using second-hand nature and botanical books. Here are some great titles to look for next time you’re thrifting.
Wow, so glad I found this page – great Ideas!
Aww, thank you Jaime! I’m so pleased you like them 😀 xoxo
Justine! OMG, it must have taken you a lot of time to create this page! So many great ideas all in one place. THANK YOU. I am a bit embarrassed that I never read your blog/website before this. I get so fixated on videos that I forget about crafting blogs. I’m set now that I subscribed. I have opened about 5 videos here which I never saw before (was before I started watching you regularly.) So I ‘ll be a busy crafter for the weekend! Thans again.
No hard feelings Jeanne – I don’t really talk about my blog as much as I should.
I really wanted it to be a great resource where people can get quick ideas rather than having to scour through hundreds of videos all the time… sounds like I’m succeeding! hehe 😀
I hope you enjoyed your crafty weekend xoxo
These are some GREAT ideas!
Aww, thank you so much Kathy xoxo