What Is A Collage Masterboard & What Do You Do With It?
How many paper scraps do you have lying around? I’m going to bet you have a lot! Even if you’ve only been crafting for a few weeks, the scraps add up. Quickly.
The good news is that there’s a fast, easy and helpful way to bust through those scraps: collage masterboards.
Read on to find out what is a collage masterboard, what you can use them for plus some top tips for making your very own masterboards.
What Is A Collage Masterboard?

A collage masterboard involves glueing your scraps of paper onto a larger piece of paper to make an interesting background. You can then cut into it to make coordinating ephemera for your journals such as tags, journal cards, pockets and more.
While you can make your masterboard however you like (remember: there are no rules in junk journaling!), the simplest way to make them is to just glue your scraps without much rhyme or reason. After all, a collage masterboard is just a background for you to further embellish.
You can choose whatever kind of paper you want to glue your scraps onto. Most people use book pages, but you could also use scrapbook paper that you don’t particularly like.
You can also add other things to your masterboard besides paper scraps, such as stickers, washi tape, stamps and stencilling.
Once you’ve finished glueing everything down, you now have a masterboard that you can cut up into different pieces of ephemera.
If you need help visualising how to make your masterboard, then here are some videos to help you:
- My Secret Garden masterboard process video
- My botanical-themed masterboard process video
- My Christmas-themed masterboard process video
- Ways To Use Our Collage Sheets from Tatty Treasure
READ NEXT: Junk Journal Definitions & A-Z Junk Journal Glossary For Beginners
Some Simple But Effective Uses For Your Masterboards
Journal cards and tags

Some of the simplest things you can make with your collage masterboards are journal cards and tags, so I’d suggest starting with those.
I also recommend turning your masterboard over and cutting into it “blind”. Not only does this make for a fun surprise, but it also stops you from second-guessing where to cut your masterboard. This is particularly helpful when you’re just starting out!
Once you’ve cut some journal cards and tag shapes, you’re free to decorate them however you like.
Remember: Your collage masterboard is just your background, so have fun fancying up your ephemera with fussy cuts, stickers and labels. You could even do some stamping and stencilling on them.
READ NEXT: 15 Junk Journal Tags & Journal Cards To Inspire You
Notebook covers

Fancy making a unique notebook cover out of your collage masterboard? All you need to do is fold it in half and strengthen your spine with some tape or fabric.
While I wouldn’t use masterboards for heavy journals, they suit notebook covers perfectly. I love this example from Tatty Treasure where she created some gorgeous botanical notebooks out of her collage masterboards.
READ NEXT: 21 Junk Journal Cover Ideas To Inspire You
Pockets and tuck spots

Once you feel comfortable with making your collage masterboards, tags and journal cards, you can move on to making more complex pieces of ephemera with your masterboards.
Why not cut them into triangular pockets for a fun and useful piece of ephemera? You can even make gusseted pockets so you’ve got more room for bulkier pieces of ephemera.
Here’s a video to show you how I made some gusseted pockets out of my masterboards.
Flip outs and flip out pockets

You can even make flip outs with your collage masterboards. You could score a hinge into your masterboard to create your “flip”, or you could attach it to an envelope flap to create a fun flip out like I’ve shown in this video.
You could even cut your masterboard to fit the front of an envelope. You can then use the envelope flap to create a simple flip out and use the envelope itself as a pocket.
READ NEXT: 14 Creative Things To Do In A Journal Or Notebook
Top Tips For Making Your Collage Masterboard
When it comes to actually making your masterboards, here are some top tips I’ve learned through making mine.
Change the direction of your paper scraps
My first tip is to change the direction of your paper scraps when you glue them, so you have text going every which way. I think this makes your collaged background more interesting.
It also stops you from getting caught up in your head as to how things are looking when you’re glueing the pieces of paper down.

Start with neutral masterboards
Another tip I have for you is to start with neutral collage masterboards until you feel more comfortable with the process.
If you’re just glueing neutral pieces of paper down, you don’t really have to worry about where you’re putting things as everything already coordinates.
Plus, your neutral masterboard will work with any theme. You just need to decorate your ephemera according to the colour scheme that you’re working with or the theme of your journal such as botanicals, florals, vintage, et cetera.
Once you get more comfortable with collage masterboards, you can start incorporating colour into them if that’s what you’re interested in. For example, I sometimes add postage stamps, washi tape and stickers to my masterboards.
Your masterboard doesn’t have to use just paper
As with all things to do with junk journals, you can be as creative as you like. One way to be more creative with your masterboards is to use materials other than paper on your background.
Maybe you want to add stickers or washi tape? Or maybe even fabric or lace? That way, when you finally cut your masterboard into ephemera, you already have an especially interesting background, which doesn’t require a lot of decorating once you’re finished.
I once made a masterboard out of vintage tickets that had seen better days. I then distressed them with my inks, and added some scraps of napkin, flicks of gold paint and other things. And before I knew it, I’d made something that resembled a brick wall, which then became side tucks. Very cool!

You don’t have to use fancy glues
When I make my masterboards, I use my Uhu glue stick, which works perfectly fine for a simple paper-to-paper task such as this. Once you’ve cut your masterboard, you can always add extra glue or even stitching where pieces may have come up.
Add some stitching and you’ll have some cool Franken paper!
Another thing you could try is to sew around each piece of paper you glue onto your masterboard. This is easiest if you have simple squares and rectangles. The final look is so cool!
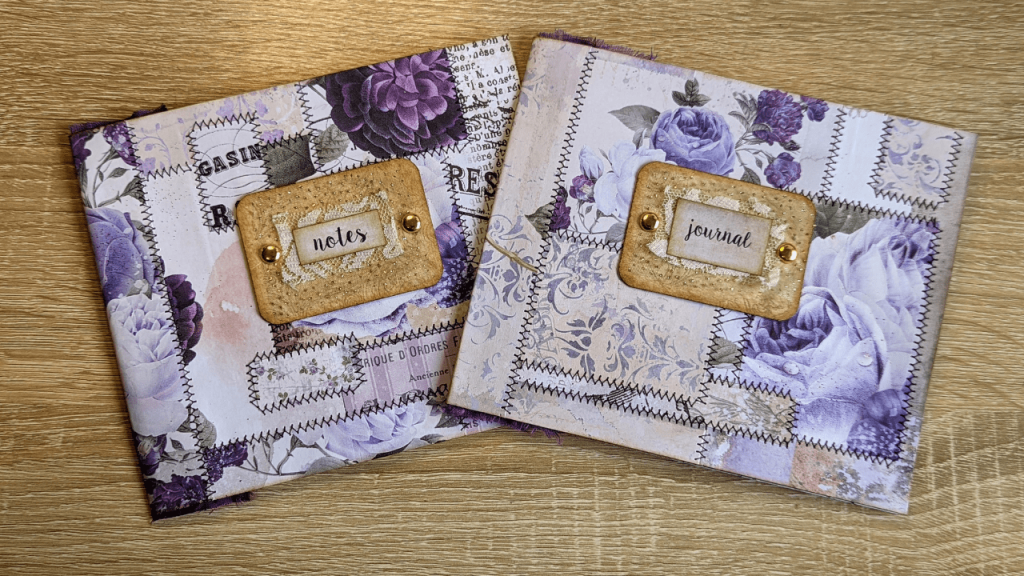
This technique is known as Franken paper, which you can see in this tutorial from Nik the Booksmith and my process video here showing how I made the fabulous purple notebooks pictured above.
Practice, practice, practice!
Finally, as with all things, don’t be afraid to practice often and change things up to suit you.
You should’ve seen my first masterboards; they weren’t amazing. But now?
I can make a fabulous masterboard in as little as five to ten minutes without much thought. My point is: practice away and you’ll soon get the hang of it.
Read More About Junk Journals
- What Is A Junk Journal?
- Junk Journal Glossary For Beginners
- How To Start Junk Journaling: My Top Tips & Ideas For Beginners
- How To Make A Junk Journal From Scratch (Step-By-Step)
- FAQs About Junk Journaling: 20+ Tips You Need To Know
- The Intriguing History Of Junk Journals
- 35+ Types Of Junk Journals You Can Try Making
- What is Junk Journal Ephemera?
- Everything You Need To Know About Junk Journal Signatures
- What Is A Collage Masterboard & What Do You Do With It?
- Are Junk Journals Still Popular? 10 Reasons Why I Love Them
I hope this blog post has helped to teach you all about collage masterboards and what you can use them for. If you have any other questions about masterboards or anything else related to junk journals, then just drop me a line in the comments below.
Did you like this blog post? Why not pin or bookmark it now, so you can read it again later?

Junk Journal Toolkit
📦 What do I need to get started?
If you’ve got paper, glue, scissors and something to bind your pages with (like a needle, thread and an awl or pokey tool), you’re good to go! Check out my essentials vs. nice-to-have supply list for more info.
🤯 I’m overwhelmed by tutorials and ideas. Where should I start?
Start with my free Mini Junk Journal Masterclass. It walks you through the process step-by-step. Even though it focuses on a mini journal, the same tips apply to any size journal.
❓ I don’t understand the terminology. Can you help?
Absolutely! My A–Z Junk Journal Glossary breaks down all those confusing terms and acronyms. Jargon be gone!
🪡 How do you keep your binding neat?
I use my bookbinding cradle to line up my holes and avoid punching too far through the pages. Smaller holes give a neater and more secure binding, and I use this thin upholstery thread for a cleaner finish.
🧵 Do I need a sewing machine?
Not necessarily! A basic sewing machine is helpful for making fabric-covered journals, but strong fabric glue can work just as well. If you stick to paper-based journals or folios, you don’t need one at all. I like the sewn look and making fabric-based journals, so I personally use a simple machine (similar to this) that’s lasted me over 10 years – it’s a trusty part of my toolkit.
🖼️ What digital papers do you use?
I use a mix of my own designs and other favourites. You can see examples here. New to digitals? Check out my mega bundle for a big saving on some of my designs or sign up for my Mahalo Clubhouse membership to get brand new digitals sent to you every month.
📜 What’s the best paper for printing digitals?
I use this 100 GSM Presentation Paper for vibrant and high-quality prints.
🖨️ What printer do you recommend?
I love my Epson Ecotank. It’s affordable, reliable and the ink lasts ages. I used to spend £30 a month on ink – now I refill just once or twice a year for under £30. While I haven’t used it myself, some other crafters recommend the HP Instant Ink program.
🖇️ What glues do you use?
My go-tos are Collall All Purpose, Cosmic Shimmer and Beacon 3-in-1. Here’s how I use each one.
📖 What books are best for junk journaling?
I love using second-hand nature and botanical books. Here are some great titles to look for next time you’re thrifting.