Essential Junk Journal Supplies & Where To Find Them
It’s now been over 4 years since I discovered junk journaling and I fall more and more in love with this addictive craft every single day.
But when you first start out, it can be overwhelming to understand what supplies you should look for and which ones can wait for later.
That’s why I’ve split this supplies list into two categories – essentials (or what I personally would be lost without) versus “nice-to-haves”.
I hope you find it helpful and full of inspiration for which items you should buy and save.
But remember: junk journaling is all about having fun and coming up with new ideas for doing things. What I might consider essential, you may be able to find ways to work around those too. And you definitely don’t need to buy and collect everything!
My “Essential” Junk Journal Supplies List
Paper

Yes, I know. This sounds obvious given junk journaling is a form of paper crafting.
But it might be helpful to know about the most common types of paper used for making junk journals and ephemera, such as:
- Tea- or coffee-dyed paper (usually copy paper)
- Book pages (both text and illustrations)
- Scrapbook paper
- Cardstock
- Notebook paper (lined, graph, dotted, etc)
- Vintage paper (book pages, ephemera, ledger pages, etc)
- Music sheets
- Wallpaper
- Envelopes
- Parchment paper
- Paper doilies
- Vellum, tracing or baking paper
Some people – like me – also enjoy using digital papers in our journals. My current favourites are listed here, but I also design my own digitals, which you can find here.

While some people prefer to print digitals onto matte photo paper, I print mine onto this 100 GSM Presentation Paper.
Everyone’s different, but this paper gives a good quality image and is slightly stronger than regular copy paper without being too bulky in journals. I also found it much cheaper than matte photo paper.
I sometimes also print onto white cardstock – such as if I’m printing labels. I also occasionally use linen-effect paper when I print scans of vintage or antique ephemera. This is expensive paper, though, so I don’t do it often!
Junk
Start saving your “junk”, such as:
- Food packaging (especially ones with windows!)
- Junk mail
- Envelopes
- Empty tea bags (such as after doing your tea dying)
- Paper bags
- Tissue paper
- Packing paper
- Wrapping paper
- Plastic (this can be used with your “windows” or to make specimen cards and other interesting ephemera)
- Clothing tags
- Corrugated cardboard
- Christmas crackers
You name it. Most types of junk can be used in your journals. Your imagination is the only limit!

Glue
Everyone has their favourite brand of glue for junk journaling – and once they’ve found it – they usually don’t like to stray away from it. I’m the same, to be honest!
These are my favourite glues for junk journaling (for both quality and price) and how I like to use them:
- Art Glitter Glue or Cosmic Shimmer Glue: Best for precision work, they don’t leave a shiny residue and are very strong. These glues can be a tad expensive (Cosmic Shimmer is the cheaper one of the two), but I find a small amount of these glues go a long way.
- Beacon 3-in-1: It’s like Fabri-tac but more readily available in the UK. I use this for fabrics, trims and “unusual” surfaces like plastic and embellishments, or anything else that needs a good strong glue like book spines.
- Uhu or Scotch Glue Sticks: I like both of these as they’re very good quality glue sticks and I trust them for lots of paper-on-paper projects.
- Collall All Purpose Glue: I use this for glueing large paper areas as it’s quick and dries clear. It’s also fairly inexpensive.
- Pabeo Matte Gel Medium: Unlike PVA glue, you don’t have to dilute Matte Gel Medium with water so you can use it straight from the bottle. I use this type of glue when decoupaging napkins onto book pages or journal covers or when I need to seal something.
Whichever glue you decide to use, there’s one thing you have to be wary of – warping your paper! From what I’ve learned over the years, the best glues for junk journals usually contain acetone and are acid-free. I believe these ingredients prevent warping and the degradation of paper over time.
I never thought I’d own as many different types of glue as I do now, but they each have their pros and cons within this craft, so put together, I’ve got all my bases covered.
Scissors
I use three pairs of scissors:
- Cheap Paper Scissors: I use these for cutting around things I’ve recently glued so that I don’t mess up my Tim Holtz ones. Mine cost £2 from Ikea and they’ve lasted me a long time.
- Tim Holtz Mini Snips: These scissors are small and sharp, so they’re perfect for fussy cutting and other precision work.
- Fabric Scissors: Mine are just a cheap pair as I usually tear my fabric, so I don’t need anything fancy.
Bookbinding Tools
In the beginning, a standard bookbinding kit will help you start your stash of journal-making supplies.
Here are the essentials you’ll need:
- Awl: Aka a “pokey tool” to help you to poke holes in your pages and journal cover easily.
- Needle: With experience, you’ll learn which needles work for you. Just don’t go for anything with a large eye as large holes in your pages can make your binding a bit loose.
- Thread: I use this lightly waxed linen thread. You may find some threads in bookbinding kits are quite plasticky and thick; I tend to stay well clear of those kinds of threads now. Some people use embroidery thread, but I’m not convinced it holds up as well as the waxed linen thread I like to use.
- Bulldog clips or large paper clips: To keep your papers in place while you bind them together.
You may also enjoy using bookbinding templates or a cradle like the one my husband designed – especially once you start working on journals with multiple signatures.
You don’t need to use a cradle, but it’ll save you a lot of time and stress in the long run.

Books & Greeting Cards
While you can make lots of things with book pages – including junk journal pages, pockets, tag bases and more – I also fussy cut images and phrases out of them.
I also love to use greeting cards – both for the images and for the sentiments inside.
Here’s a list of the books I personally love using.

Punches
I use my corner rounder and circle punch all the time and they save me so much time.
I use my corner rounder when I make journal cards because I think rounded corners make them look more finished.
And I use my circle punch for creating thumb notches in pockets (to make it easier to get things in and out of the pockets), plus I use it to cut circles out of paper and cardstock for policy closures.
I’ve also recently treated myself to this 2.5-inch circle punch, which comes in handy when making larger thumb notches for larger ephemera and specimen cards. But this particular punch is definitely more of a nice-to-have than an essential!

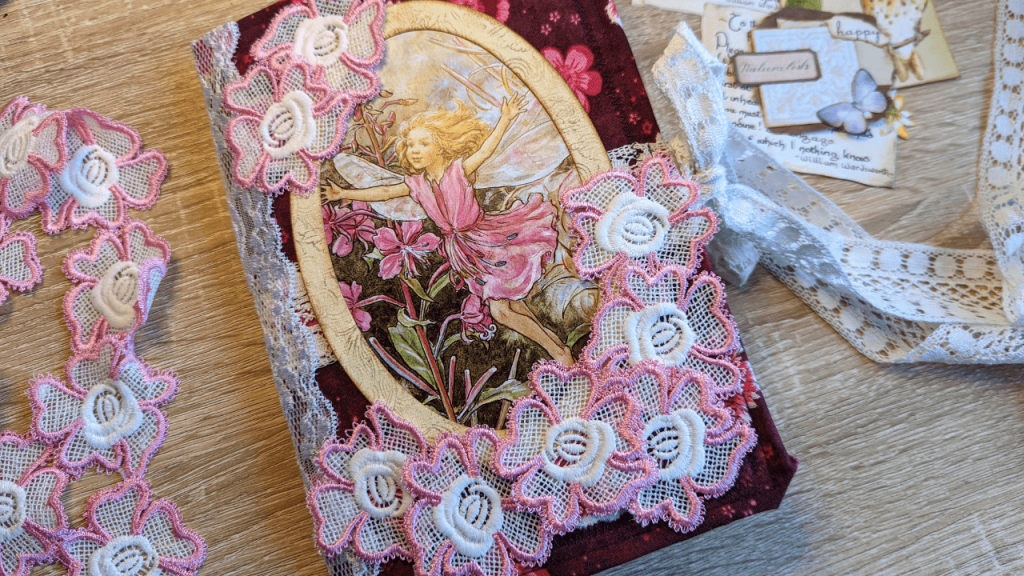
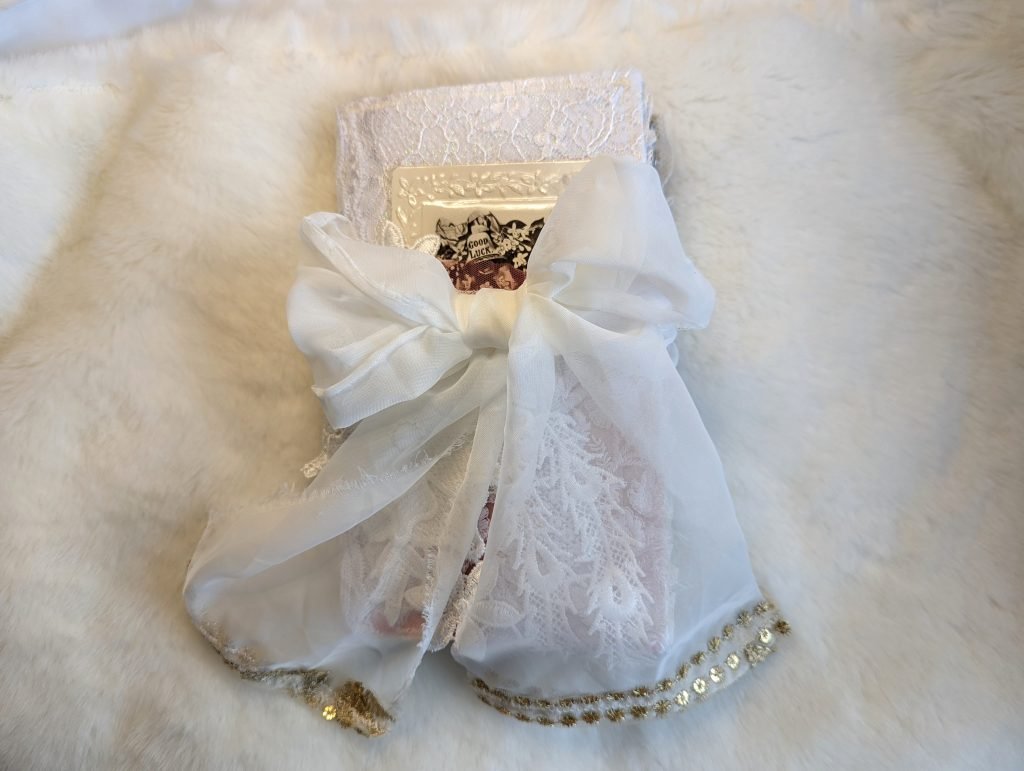
Fabric & Trims
If you like the idea of mixing textures in your journals, you may also want to purchase some pretty fabrics and trims.
You may find some items in charity shops and thrift stores, but you might also find it cheaper to buy curtains or clothing and harvest material from those instead. I’ve done this lots of times!
As for trims, I use these types the most:
- Lace: To cover my binding along the spine, to use as decoration and to make pretty embellishments (especially fabric clusters).
- Crochet: Same as above.
- Fluffy yarn: For tag toppers and decorating ephemera. This type of fluffy yarn is also sometimes called eyelash trim.
- Ribbon: For closures.
- Crinkled seam binding: For closures and tag toppers.
Sewing Machine
While you can absolutely make journals without a sewing machine, I personally would be lost without mine as I often make soft-cover fabric journals.
I could make them with just fabric glue, but I personally feel more comfortable with the longevity of my journals when I sew them.
I have a very simple Brother sewing machine similar to this one, which I’ve had for about 10 years. It only has straight and zigzag stitches, but it’s worked perfectly with lots of different paper types, materials and thicknesses. Plus, it cost me less than £100!
I even used it to make this unique chocolate wrapper journal cover!

Distress Inks & Daubers
Once again, this is a personal preference but I think distress inks help cover up a multitude of sins – particularly as I personally struggle with cutting straight lines.
Don’t feel you need every colour under the sun though!
I do just fine with my Vintage Photo Distress Ink for most things and then I have the same ink in Tea Dye and Walnut Stain for certain projects.
I use the Tea Dye one when I work with Edith Holden book images and for my beach-themed projects, while I love using Walnut Stain for woodland-themed projects.
I also recently treated myself to a few different colours, which you can see me testing out in this video. But again, these are more of a nice-to-have.
As I say, my Vintage Photo distress ink (or really any brown distress ink) is my absolute go-to!
💡 Swap this for that idea:
Do you need a specific colour of distress ink for your project, but you haven’t got it in your stash already?
Try using old powder makeup if you have that instead. Blusher, bronzer and old eye shadows would all work just as well.
You might also like to buy an ink dauber like this one to help you ink the edges of your papers easily. I used makeup sponges initially, but I’ve found these daubers last so much longer. So, in my opinion, they’re worth the slightly higher cost.
💡 Bonus Tip: You can use makeup brushes and sponges instead of special daubers and tools.
Let’s Talk About The “Nice-to-Haves”
Once you really get into this addictive hobby, you’ll start to get a better idea of what you like to use currently and what you’d like to use more of in the future.
Here are some other items you may want to start looking for – either now or later on, but I wouldn’t call these essential. They’re more like “nice-to-haves” – especially if you can find a bargain or two.
- We R Memory Keepers Crop-A-Dile and Eyelets: Useful for journal closures, topping tags or journal cards and when doing the elastic bookbinding method.
- Washi or Transparent Stickers: You can use these to make quick and easy ephemera and embellishments.
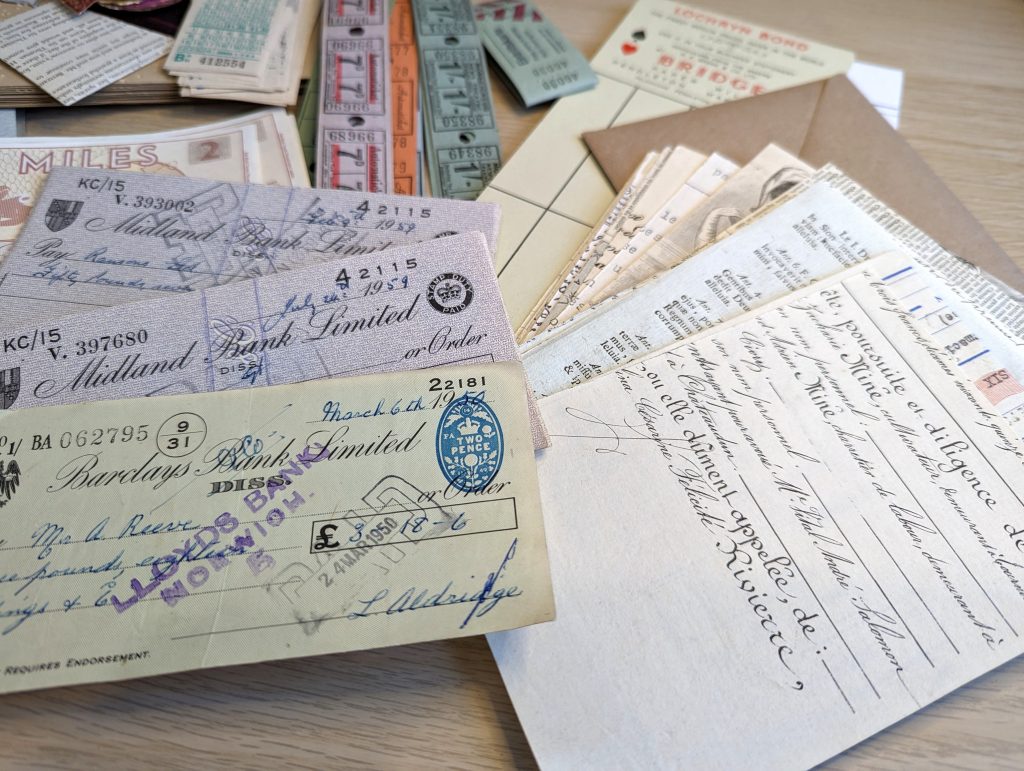
- Vintage Ephemera: To give your journals an interesting look and feel (especially if you’re making a vintage-themed one). You can also use faux vintage ephemera (i.e. scans of the originals).
- Napkins: To make decoupaged journal covers, tags/journal cards, pockets and even pages.
- Washi Tape: To use as decorations, fix up tears and join pages together for binding.
- Embellishments: Such as buttons, flatback pearls, brads, bulb pins and safety pins to help you make beautiful clusters, dangles and other pretty embellishments.
- Broken jewellery: Harvest beads, jump rings, charms, chains, clasps and more from broken jewellery and use them in dangles and pretty embellishments.

- Jewellery Pliers: Useful if you plan on making lots of dangles and things like that. Look for needle-nose pliers (to help you hold things), round-nose pliers (to help you curl pins and wires) and diagonal pliers (to help you cut thin metals) and you should have all your bases covered. You can usually find these pliers together in a set – just like this one.
- Metal Book Plates and Corner Protectors: For a more professional look on the front of your journals.
- Wax Seal Kit: Just for fun and because you can make gorgeous vintage-inspired ephemera and embellishments with them, such as Regency-style letters!

- Stencils and Stamps: For decorating plain pages and the backs of tags and journal cards without adding bulk! It’s best to use blending brushes with your stencils though.
- Tear Ruler: For a grungy torn paper look… but with precision.
- Printer: Especially if you plan on using all the gorgeous junk journal printables and digitals available to you. I have the Epson Ecotank (ET-2860), which saves immensely on ink costs and produces beautiful prints.
- Presentation Paper: Your digitals will look brighter and more professional on this type of paper than on regular copy paper. I use this brand, which is fairly cost-effective if you don’t mind buying the paper in bulk.
- Sissix Big Shot, Dies and Embossing Folders: Absolutely not essential, but you might like to consider one if you plan on using a lot of dies and embossing in your projects. I bought mine second-hand on eBay, but I’ve only used it a few times since buying it. It’s a bit of a faff to get out and use, to be honest!
- Guillotine or Paper Trimmer: While you can simply tear your papers down to size to fit your journal, you may occasionally want precision in your projects. I find this little guillotine especially useful because it doesn’t take up too much space and has grid markings to help you cut straight.
Where To Find Your Supplies
As the name suggests, you can find supplies for your journals almost anywhere and they don’t have to cost a pretty penny!
Start saving things like junk mail, envelopes and packaging, which can all be used in this fabulous craft.
Ask your friends and family if they’ve got anything they can give you, such as unwanted jewellery, greeting cards or any other crafty bits they might have lying around and not know what to do with.
You could also join some Facebook groups and partake in swaps if it’s allowed in the group – including supply swaps.
But you may also want to buy some of your supplies as well.
In this case, you’ll probably find the following types of stores and online marketplaces the most helpful:
- Etsy: Especially if you want to use digital kits in your projects.
- eBay: Especially if you’re on the hunt for vintage ephemera and/or random craft bundles. I’ve found lots of people destashing supplies on there over the years.
- Amazon: Helpful for paper, glue, stickers, washi tape, etc.
- Thrift stores and charity shops: Look for unwanted craft supplies as well as jewellery and clothing you can repurpose.
- Car boots, yard sales and estate sales: You may be lucky enough to find amazing vintage items as well as regular supplies.
Printable Shopping List
If you’d like to receive a printable version of this list and check off items as you go, please complete the form below, or head to this page and enter your details. I hope you find it helpful!
Read More About Tools & Supplies For Journaling
- Introducing The Mahalo Designs Digital Library: The Clubhouse Collection
- Check Out The Mahalo Clubhouse Membership (Free Digitals Every Month!)
- Check Out My Range Of Junk Journal Classes, Courses & Workshops
- Introducing My New Tool: The Digital Kit Catalog
- How To Organise Your Digital Kits (3 Ways!)
- Essential Junk Journal Supplies & Where To Find Them
- Tips For Organising Your Supplies
- Recommended Junk Journal Printables (Tried & Tested!)
- 7 Best Glues For Paper Crafts & When To Use Them
- My Favourite Etsy Shops For Junk Journal Supplies
- 20+ Best Gifts For Journalers They’ll Love

Junk Journal Toolkit
📦 What do I need to get started?
If you’ve got paper, glue, scissors and something to bind your pages with (like a needle, thread and an awl or pokey tool), you’re good to go! Check out my essentials vs. nice-to-have supply list for more info.
🤯 I’m overwhelmed by tutorials and ideas. Where should I start?
Start with my free Mini Junk Journal Masterclass. It walks you through the process step-by-step. Even though it focuses on a mini journal, the same tips apply to any size journal.
❓ I don’t understand the terminology. Can you help?
Absolutely! My A–Z Junk Journal Glossary breaks down all those confusing terms and acronyms. Jargon be gone!
🪡 How do you keep your binding neat?
I use my bookbinding cradle to line up my holes and avoid punching too far through the pages. Smaller holes give a neater and more secure binding, and I use this thin upholstery thread for a cleaner finish.
🧵 Do I need a sewing machine?
Not necessarily! A basic sewing machine is helpful for making fabric-covered journals, but strong fabric glue can work just as well. If you stick to paper-based journals or folios, you don’t need one at all. I like the sewn look and making fabric-based journals, so I personally use a simple machine (similar to this) that’s lasted me over 10 years – it’s a trusty part of my toolkit.
🖼️ What digital papers do you use?
I use a mix of my own designs and other favourites. You can see examples here. New to digitals? Check out my mega bundle for a big saving on some of my designs or sign up for my Mahalo Clubhouse membership to get brand new digitals sent to you every month.
📜 What’s the best paper for printing digitals?
I use this 100 GSM Presentation Paper for vibrant and high-quality prints.
🖨️ What printer do you recommend?
I love my Epson Ecotank. It’s affordable, reliable and the ink lasts ages. I used to spend £30 a month on ink – now I refill just once or twice a year for under £30. While I haven’t used it myself, some other crafters recommend the HP Instant Ink program.
🖇️ What glues do you use?
My go-tos are Collall All Purpose, Cosmic Shimmer and Beacon 3-in-1. Here’s how I use each one.
📖 What books are best for junk journaling?
I love using second-hand nature and botanical books. Here are some great titles to look for next time you’re thrifting.
Wondering if you would share the settings to you use on your Epson printer.
Absolutely! If it’s a JPG file, then I print it as a full-page image on a “High Quality” setting. This uses more ink, but I think it gives a much richer colour and detail than normal quality. With the Ecotank, I still barely use any ink anyway. If it’s a PDF file, then I use the “Advanced” settings on my PC to get the official Epson modal (you may have to update your drivers). From there, I print it in “High” quality and sometimes have to change the size of paper etc. I hope this helps! 🙂 xoxo
Hello. Can you share a link to the software download please? Thank you. Blessings..
Hi Felecia,
I have an Epson Ecotank so I typed in my model number (ET-4700) into this website: https://www.epson.co.uk/en_GB/support
It then gives you a list of printer drivers, so I just installed the relevant ones. That then gave me the “advanced settings” modal I mentioned above.
I hope this helps 🙂 xoxo
Great list!
Thank you Melissa! I’m glad you think so 😀
I would love this in a printable format, so I can go down the list and check off what I have and need. I can create one from your wealth of knowledge and resources you have provided in this article, but thought I would check first!! Thanks a million! Great article!
Hi Kelly,
I’m glad you like the blog post 😀
I don’t have a printable version of this list… yet! But I’m sure I can make one; likely in a couple of weeks or so xoxo
Hi Kelly,
I just thought I’d let you know that I made a printable version of the supplies list. So sorry for the delay – I ended up having more time off in August than I was originally planning.
Anyway, there’s a form in the blog post where you can request a printable version, or you can request it directly here: https://landing.mailerlite.com/webforms/landing/i9c9i2
Take care,
Justine xoxo