Quick & Easy DIY Love Map
You can make lots of projects using maps but these DIY love maps are probably my favourite.
They’re easy to make, taking less than ten minutes in total, and look so cute inside a beautiful frame.

When to make one
Maybe you know a couple who’s celebrating a destination proposal or wedding, or have just bought their first home together? This map picture is perfect for them.
Or maybe you want to show your other half you care on Valentine’s Day or on your anniversary by highlighting your own journey?
You could even make a set of these to show where you met, got engaged, got married and bought your first home together. You could either use a multi-aperture frame or use separate frames to help create a cute gallery wall, which will really show off your met, engaged, married map.
Either way, you’re going to love making this DIY map heart and I’m sure whoever it’s for will love it too!
Supplies you’ll need
To make your love map, you don’t need many supplies and you probably have most of them lying around the house:
- Maps of the places you want to highlight (vintage maps, road atlases, street maps and even printouts from Google Maps all work well for this)
- Heart template (you can make your own using an old cereal box or similar)
- Cardstock (for the background)
- Picture frame
- Scissors
- Glue stick (I use Uhu glue)
How to make your love map
Step 1. Get your template ready.
Start by making your heart template using an old cereal box or similar. You can trace around a heart shape printed from your computer or you can draw it freehand.
Remember to check your template is the right size for your frame.
💡 Top Tip: To get a symmetrical heart every single time, fold your card in half, draw one half of the heart and then cut from the folded edge.

Step 2. Cut out your heart shape from the map.
Find the place you want to highlight on your map and cut around it using your template.
💡 REMEMBER: Check the place you’re highlighting is in the middle of your heart if possible!
Step 3. Prepare your background.
To help your map pop inside the frame, you can back it with cardstock in a contrasting colour or shade.
Once you’ve chosen your card, cut it down to the right size for your frame. You want it to fill the whole of your picture frame.
When you’re ready, glue your heart onto the cardstock.
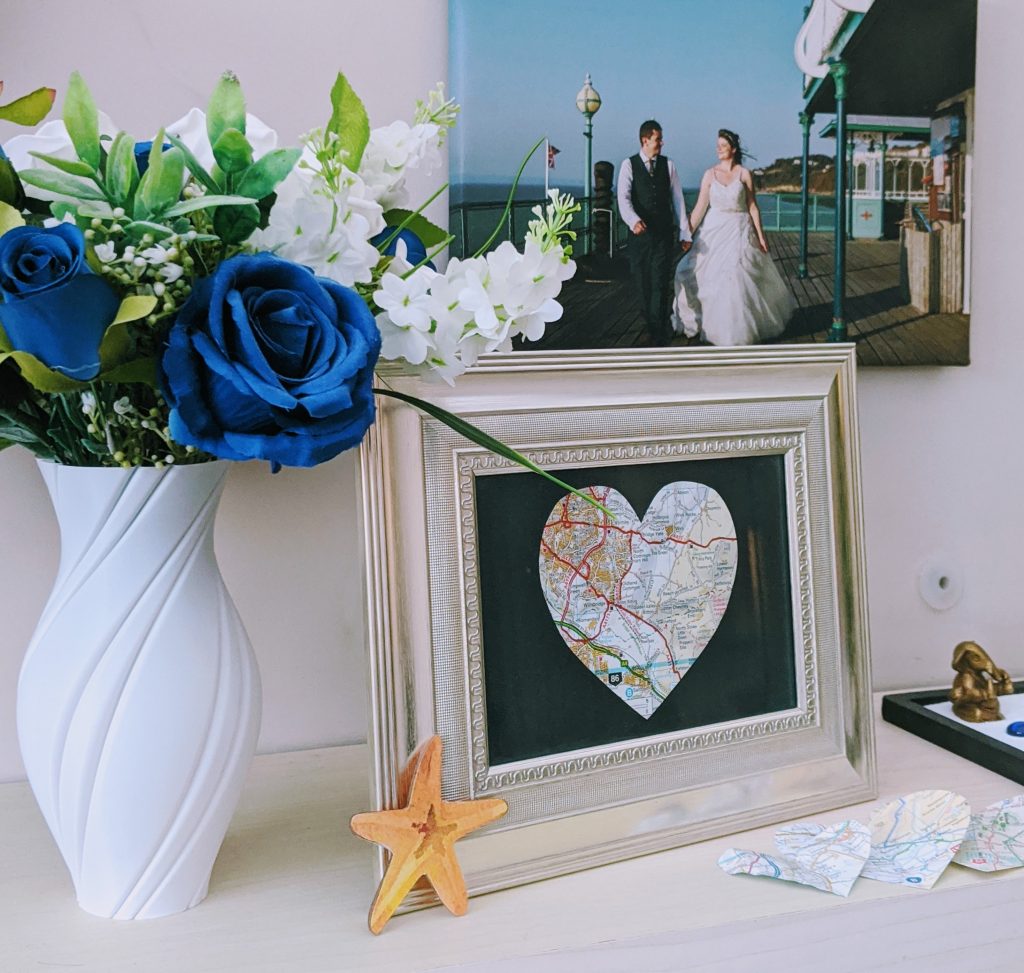
💡 Top Tip: I’ve seen lots of these hearts using white or cream-coloured cardstock. I chose pearlescent blue to match our wedding colours, but I really like how it makes the heart stand out even more in the frame! I also used this same cardstock when I made our wedding card keepsake book.
Step 4. Frame your art!
Place your finished art in your frame and you’re done! Didn’t I tell you this is a ridiculously easy map project?!
Bonus tips
Once you’ve mastered this simple heart shape, you can make more of these map pictures with other shapes.
Maybe a house shape to celebrate your new home? Or a plane to commemorate your first trip abroad together? Any shape works so get creative with it!
You could even add some text to the coloured cardstock to say cute things like “where we met”, “where it all began” or “where you stole my heart”.

DIY Heart Map Picture
This DIY love map is easy to make, taking less than ten minutes in total, and looks so cute inside a beautiful frame. It would make a great gift for newlyweds, new home owners or for your other half to celebrate where you met, got engaged or got married.
Materials
- Maps
- Heart template
- Cardstock
- Picture frame
Tools
- Scissors
- Glue stick
Instructions
- Start by making a heart template using an old cereal box or similar. REMEMBER: Check your template is the right size for your frame!
- Find the place you want to highlight on your map and cut around it using your template. REMEMBER: Check the place you’re highlighting is in the middle of your heart if possible.
- Cut your cardstock to the right size for your picture frame. You want it to fill your frame completely.
- Glue the heart it onto the cardstock.
- Place your completed heart picture in the frame and you’re done!
Notes
I’ve seen lots of these hearts using white or cream coloured cardstock. I chose pearlescent blue to match our wedding colours, but I really like how it makes the heart stand out even more in the frame!
Discover More Romantic Craft Ideas
- 14 DIY Paper Anniversary Gifts To Make In A Weekend
- Free Printable Date Night Coupons
- DIY Paper String Art Heart
- DIY “A Year Of Dates” Gift For Your Other Half
- Quick & Easy DIY Heart Map Art
- How To Make Easy DIY Swirl Roses
- Quick & Easy Regency Letter Folding Tutorial
- Romantic Envelope Stack (With Free Printable)
- DIY Wedding Card Keepsake Book
- Romantic Wedding Journal
- Meet Me Under The Mistletoe Sign
Feeling inspired? Share this DIY map project on Pinterest!

Here’s another cute project that I think would be easy and nice to give to special people in your life. The supplies are not expensive so that makes it a little more appealing to me. Thanks for the idea , Justine
I’m glad you like it!!
Cheap and easy… two of my favourite things 😀 xoxo