Quick & Easy Regency Letter Folding Technique (Jane Austen’s Method!)
If you’ve ever wondered how people like Jane Austen used to fold their letters, then you’re in the right place! Listed below are some instructions for a quick and easy Regency letter folding technique, plus a bonus video version at the end.
Once upon a time, paper was very expensive. So, to save on costs, people would avoid using separate envelopes to send their letters in. Instead, they would simply fold the letter itself into an envelope – to save on costs and also to keep their words private from prying eyes.
Here’s how they did it…
Tutorial: Quick & Easy Regency Letter Folding Technique

This is one of several ways you can fold a Regency style letter. I like to use this particular technique as it’s quick and easy to remember, produces a good size letter and none other than Jane Austen herself used this method. So, that’s good enough for me!
What You’ll Need:
- Paper (any paper will do, but parchment paper would be super fancy and more authentic to the Regency period)
- Wax seal kit or pre-made wax seal (optional)
Regency Letter Folding Instructions
Once you’ve finished writing your top-secret letter, follow these steps to fold it up into an envelope shape… just like Jane Austen would’ve done.
Step 1. Turn your letter landscape.
Step 2. Fold the paper in half width-ways, but don’t actually crease the paper! Simply pinch the top corner and open your paper back out again. You should now see a pinch mark at the top of your paper indicating where the centre is.

Step 3. Fold one side of the paper into the middle to meet your pinch mark.
Step 4. Fold the other side of the paper into the middle in the exact same way.

Step 5: Fold the top down to make your envelope flap.

Note: It’s up to you how much you fold over for this part. I like to go with about 2 inches, so that my wax seal is in the middle of the envelope when I’m finished. But you could go with an inch instead if preferred. You can see the difference between the two in the photo below.

Step 6: Tuck the bottom of your paper into the flap you’ve just made and fold the bottom. You should now have something that resembles an envelope.

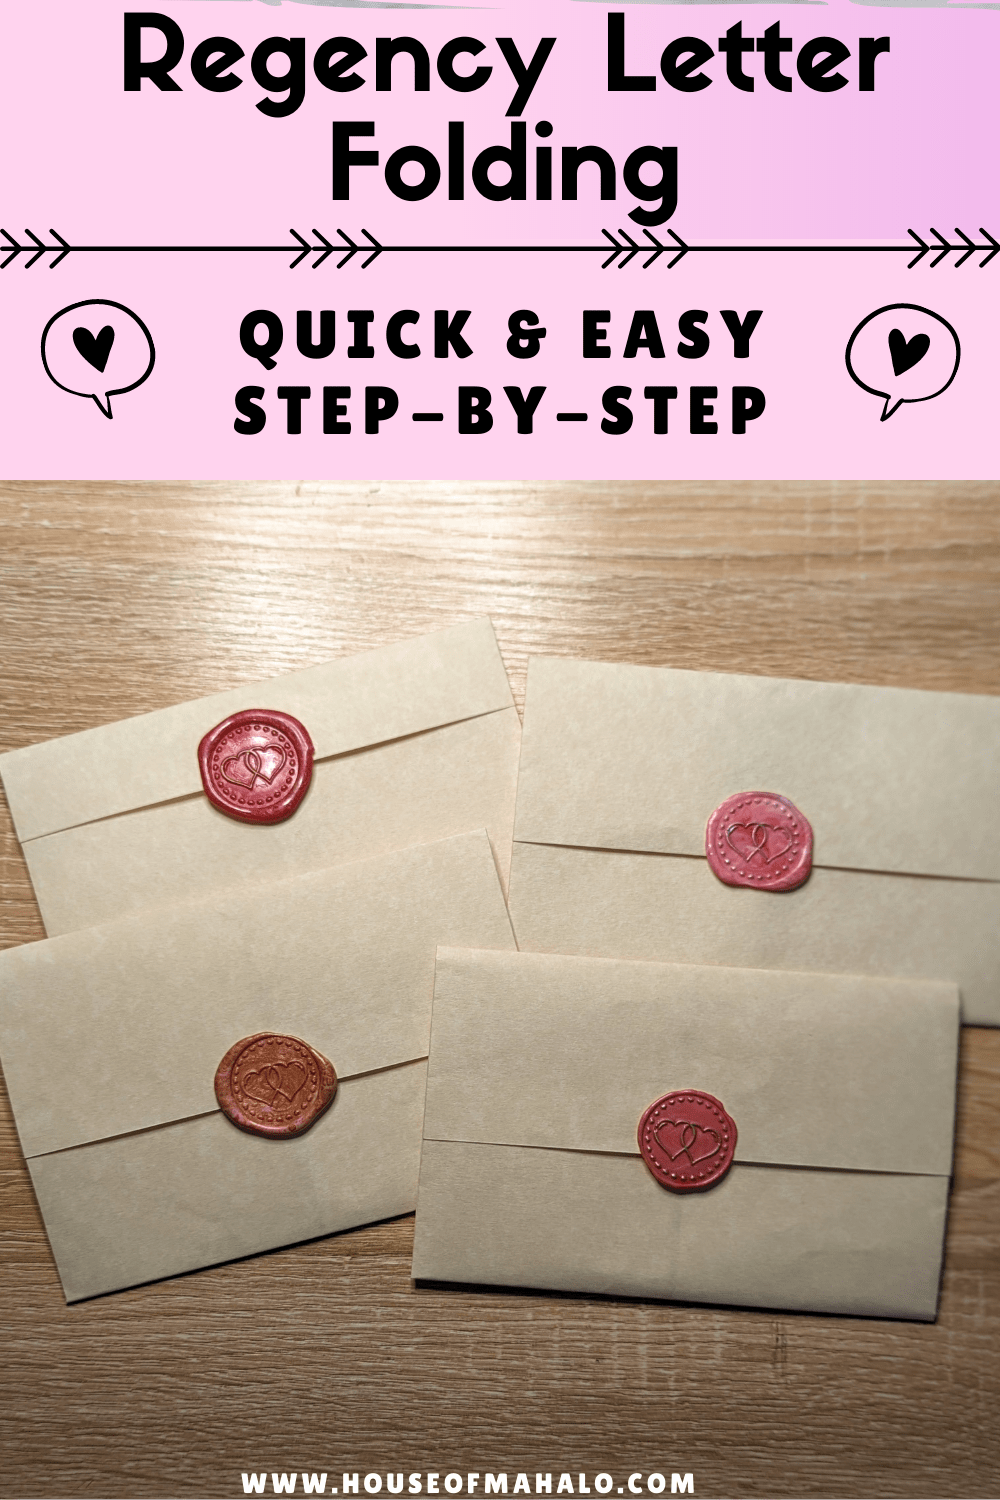
Step 7: (Optional) Finish with a wax seal, sticker or other embellishments.
Tip: If you don’t want to have to break the seal when opening the letter, then glue a pre-made wax seal on instead. Glue the top half only onto the envelope flap and then you can open the letter over and over again without the need to break the seal or rip the paper.

Bonus Tip: If you’re using your Regency style letters in a junk journal, then you can also hide ephemera inside your letter such as a postcard, stickers, tickets and any other paper ephemera that’ll fit inside.
Not only would these letters look great as journal ephemera, but they’d also be perfect as cute love letters to send to your other half. Especially if you use a heart stamp for your wax seal like I did for mine.
Watch the video version:
If you’d rather watch the video version of this Regency letter folding technique, then here you go:

Discover More Junk Journal Techniques
- Quick & Easy Regency Letter Folding Technique (Jane Austen’s Method!)
- What Is A Collage Masterboard & What Do You Do With It?
- 10 Junk Journal Binding Ideas & Tutorials To Inspire You
- How To Keep Pressed Flowers In A Journal (7 Easy Ideas To Try!)
- 14 Creative Things To Do In A Journal Or Notebook
- How To Make A Junk Journal Cover With Candy Wrappers & Lace
- DIY Antique Writing Folio: Upcycling Old Books Idea
- DIY Travel Notebook Set: Upcycled Passport Holder Idea
- 8 Ways To Use Junk Journal Embellishments (With Examples)
And if you liked this tutorial, why not bookmark it or share it with a friend?
Junk Journal Toolkit
📦 What do I need to get started?
If you’ve got paper, glue, scissors and something to bind your pages with (like a needle, thread and an awl or pokey tool), you’re good to go! Check out my essentials vs. nice-to-have supply list for more info.
🤯 I’m overwhelmed by tutorials and ideas. Where should I start?
Start with my free Mini Junk Journal Masterclass. It walks you through the process step-by-step. Even though it focuses on a mini journal, the same tips apply to any size journal.
❓ I don’t understand the terminology. Can you help?
Absolutely! My A–Z Junk Journal Glossary breaks down all those confusing terms and acronyms. Jargon be gone!
🪡 How do you keep your binding neat?
I use my bookbinding cradle to line up my holes and avoid punching too far through the pages. Smaller holes give a neater and more secure binding, and I use this thin upholstery thread for a cleaner finish.
🧵 Do I need a sewing machine?
Not necessarily! A basic sewing machine is helpful for making fabric-covered journals, but strong fabric glue can work just as well. If you stick to paper-based journals or folios, you don’t need one at all. I like the sewn look and making fabric-based journals, so I personally use a simple machine (similar to this) that’s lasted me over 10 years – it’s a trusty part of my toolkit.
🖼️ What digital papers do you use?
I use a mix of my own designs and other favourites. You can see examples here. New to digitals? Check out my mega bundle for a big saving on some of my designs or sign up for my Mahalo Clubhouse membership to get brand new digitals sent to you every month.
📜 What’s the best paper for printing digitals?
I use this 100 GSM Presentation Paper for vibrant and high-quality prints.
🖨️ What printer do you recommend?
I love my Epson Ecotank. It’s affordable, reliable and the ink lasts ages. I used to spend £30 a month on ink – now I refill just once or twice a year for under £30. While I haven’t used it myself, some other crafters recommend the HP Instant Ink program.
🖇️ What glues do you use?
My go-tos are Collall All Purpose, Cosmic Shimmer and Beacon 3-in-1. Here’s how I use each one.
📖 What books are best for junk journaling?
I love using second-hand nature and botanical books. Here are some great titles to look for next time you’re thrifting.