Junk Journal Supplies Organisation (Sort It Out Saturday Video Series)
A few years ago, I was buried under a mountain (or several mountains!) of junk journal supplies. I’d done what so many newbie crafters do and bought and collected loads of stuff, but I wasn’t using it.
Mainly because I couldn’t find anything!
Now, my studio is much more organised – and it’s all thanks to my “Sort It Out Saturday” video series.
Each week, I tackled an area of my craft room or a category of supplies that were in desperate need of a sort out, destash, declutter and some kind of organisation system.
I recorded everything on video – and now I’m here to recap what happened. Hopefully, you’ll be able to take something away from today and organise your own mountain of supplies.
5 Weeks To An Organised Craft Room
Before we go any further, I thought it’d be helpful (and fun!) to show you what my craft room looked like initially.
This is very much “the before” shot… Mum, Dad: look away now, please!
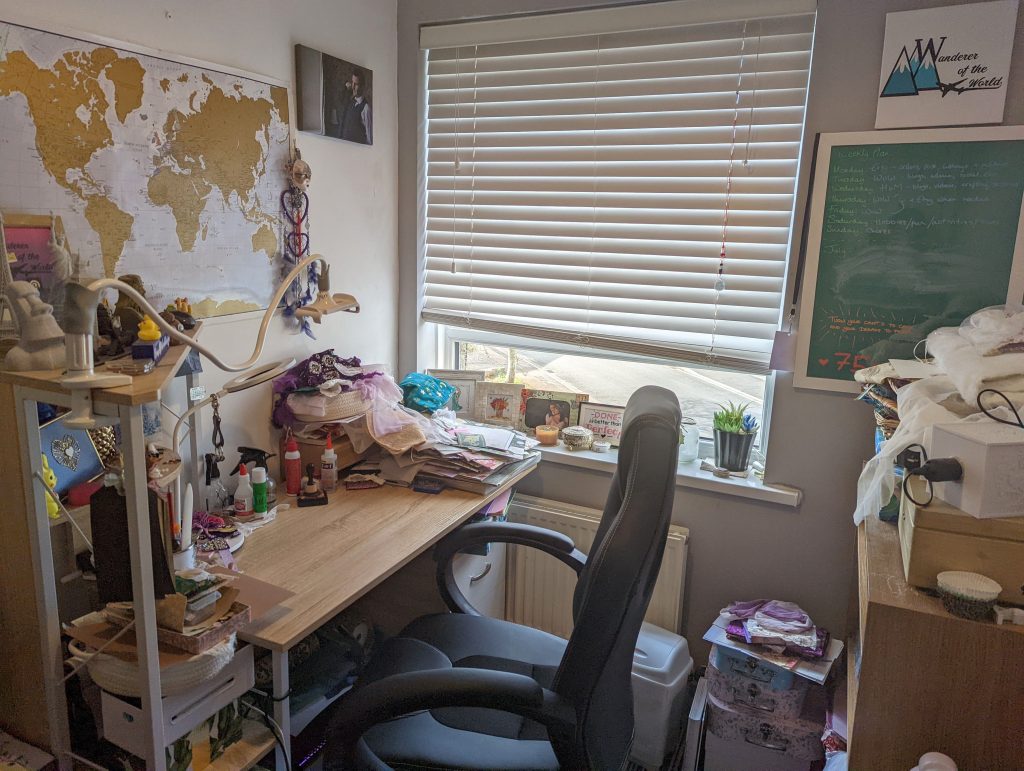
And here’s the video version where the messy and general disorganisation continues behind me…

Okay, let’s get organising!
Week 1: Fabric Organisation
Here’s a look at what my fabric stash looked like before I began organising them and what I ended up with.

I still wanted to keep all my fabric together in one box (I use a large picnic hamper I got for £2 at a car boot sale). But I wanted to be able to find everything much more easily and without having to take out everything to get to the fabric I wanted to use.
I cut up various pieces of cardboard packaging to fit my hamper, which I used as DIY fabric storage boards.
I then wrapped each piece of fabric around the boards and secured them with a pin to keep the fabric in place. I then organised the boards of fabric by colour.
Now, I can see exactly what I’ve got and I can pull out each piece of fabric one by one without dislodging everything else. Simple, but very effective!
Here’s how my box of fabric looks now (aka so much better):

And… in case you’re interested, my crafty project this week to use up leftover fabrics was mass making fabric flips for my junk journals.

Week 2: Organising Book Pages, Music Sheets & Vintage Paper
Next up, was a BIG problem! I had book pages, music sheets and vintage paper coming out of my ears. I think I counted that I had these types of papers in at least seven or eight different areas of my craft room.
You can see the extent of the problem in this video.

I was determined to whittle my stash down and organise it in such a way as to have these papers in just one, maybe two, areas of my craft room instead.
And I almost managed it!
Here’s how I organised my papers into categories:
- Neutral book pages & music sheets – for collaging and decoupage
- Neutral PLAIN – for backing journal cards, tags, etc
- Sturdy book pages PLAIN – for making bases for pockets, folios, tri-folds, envelopes, collage masterboards, etc
- Sturdy book pages PRETTY – for making decorative pockets, folios, envelopes, etc
- “Special” pages – for using as full-size journal pages
- Cover stars – images and pages that belong on the cover of a journal
- Pretty pages for cutting down – to use as ephemera, journal cards, etc
- Pages for fussy cutting
- Strips – for making masterboards, page edges, word dangles, etc
- Glue sheets – to protect your desk when crafting; ideal for book pages you don’t like or that have naughty words on them
Grab a printout of the list above here >>
I used these A4 plastic wallets to organise everything. I also had a couple of extra folders for pages pertaining to specific projects; in my case, Edith Holden and the Flower Fairies.
I still have a lot of book pages that need using up (we all have this problem, though, right?!).
Here are a few ideas I’ve got for using up book pages quickly:
- Mass make folio, tri-fold, envelope and pocket bases
- Glue together multiple music sheets and decorate with napkins to make insides of journal covers
- Make several collage masterboards (on top of sturdy book pages)
- Use strong but boring pages as backings for fabric or lace pockets
- Decoupage stuff with plain book pages (storage boxes, shelves, furniture, make artwork, etc)
In case you’re wondering, my crafty project for this week was to make a couple of Edith Holden trifold junk journal inserts, which I really enjoyed making.

But I also have lots more book page projects I want to get stuck into soon. As always, I’ll be sure to keep you posted on those.
Week 3: Paper Scraps
Paper scraps were another BIG problem for me.
My scrap box was falling apart and overflowing. I felt like I was drowning in scraps. And I didn’t have a proper system in place, which meant I often avoided looking in my scrap box when working on projects.
Not good.

I decided to tackle the problem head-on.
I recycled the cardboard box my paper scraps used to live in. They’re now all contained within just one A4 plastic folder (the same ones I used last week to organise my other papers).
Using bulldog clips, I then categorised my scraps in the following way:
- Plain scraps (ideal for making scrappy notepads)
- Neutral scraps (e.g. book pages, music sheets, etc)
- PRETTY neutral scraps (e.g. digitals, wallpapers, etc)
- By colour (e.g. pink, green, blue, purple, etc)
This was a massive help!

Not only could I see what kind of scraps I had the most of (i.e. what project I should prioritise to get them used up), but organising my scraps by colour also meant mass making masterboards and collage sheets was quick, easy and actually enjoyable.
In just two mornings, I’d blasted through over half of my scraps – amazing!
In my second video of the day, I showed what I made with my scraps (10 scrappy notepads, half a dozen masterboards, a dozen or so collage sheets and a handful of cluster sheets).
I then cut down one of my masterboards to make journal cards and a pocket and I also made a handful of paper clusters. Talk about quick and easy ephemera! See how I made these here.

Week 4: Fabric Scraps, Lace & Trims
Last week, I tackled my paper scraps. This week, I tackled my fabric scraps and my lace and trims.

I started by wrapping my lace, ribbons and trims around pieces of cardboard (much like I did in the fabric week).
Instantly, this turned my tangled mess of trims, which were taking up two full large boxes into an organised assortment of laces that could all fit together within one drawer.

I also organised my fabric scraps by colour. I placed all my neutral scraps within a portable bag and my coloured scraps went into an old sweet jar.
I’d seen this “jar of scraps” idea on Pinterest, and while I’m pretty happy with how well it seemed to contain everything, it might not be the most practical long-term solution. We’ll see.
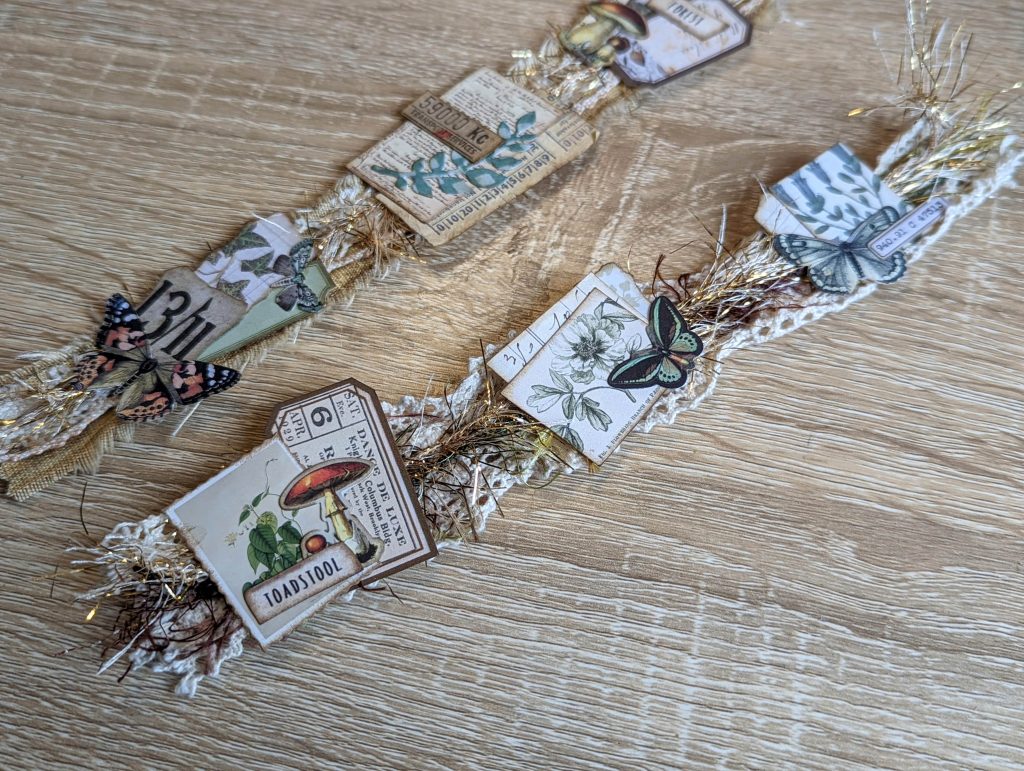
In this video, I also shared my ideas for storing snippet strips and things we’ve made with our fabric scraps. I’ll be hanging mine up, so they look decorative in my craft room and don’t get messed up over time.
UPDATE: I now keep my trims in white organza bags; still colour-coded. That way, I can just shove everything back in the bags after crafting – without having to wrap them around cardboard. Did I ever tell you I’m a bit of a lazy crafter?
Naturally, this week’s crafty session was to make snippet strips. I made two different kinds: ones with a fabric base and ones with a paper base. I love how they turned out!

Week 5: Packaging and Bits & Bobs
By week 5, I’d gotten most of my craft room pretty well organised, so this time, I simply shared some ideas I’d already put into action before starting my “Sort It Out Saturday” series.

I shared how I’ve got all my packaging organised by type of item, such as all envelopes together, future journal covers, window packaging, etc.
I’m also keeping my packaging contained within other packaging that might one day be journal covers – so I’m hitting two birds with one stone so to speak.
I then shared how I organise my small pieces of ephemera and other bits and bobs such as stickers, fussy cuts, labels and beads. They’re housed within plastic drawers and boxes so I can easily see what I’ve got and keep like with like.
While I didn’t share a crafty video this week (I was just too tired!), I did share a “Progress Update” of how my craft room looked – 5 weeks on:

UPDATE: I’ve since completely revamped my studio (including changing the carpet!), so it looks very different today:

I hope you’ve enjoyed this behind-the-scenes look at how I tackled my mountain of supplies. It was a big job that I needed to do for a long time.
But it feels so good to finally get on top of everything, so I hope you’ve found my videos and ideas helpful for tackling your own supplies.
Read More About Tools & Supplies For Journaling
- Introducing The Mahalo Designs Digital Library: The Clubhouse Collection
- Check Out The Mahalo Clubhouse Membership (Free Digitals Every Month!)
- Check Out My Range Of Junk Journal Classes, Courses & Workshops
- Introducing My New Tool: The Digital Kit Catalog
- How To Organise Your Digital Kits (3 Ways!)
- Essential Junk Journal Supplies & Where To Find Them
- Tips For Organising Your Supplies
- Recommended Junk Journal Printables (Tried & Tested!)
- 7 Best Glues For Paper Crafts & When To Use Them
- My Favourite Etsy Shops For Junk Journal Supplies
- 20+ Best Gifts For Journalers They’ll Love
Junk Journal Toolkit
📦 What do I need to get started?
If you’ve got paper, glue, scissors and something to bind your pages with (like a needle, thread and an awl or pokey tool), you’re good to go! Check out my essentials vs. nice-to-have supply list for more info.
🤯 I’m overwhelmed by tutorials and ideas. Where should I start?
Start with my free Mini Junk Journal Masterclass. It walks you through the process step-by-step. Even though it focuses on a mini journal, the same tips apply to any size journal.
❓ I don’t understand the terminology. Can you help?
Absolutely! My A–Z Junk Journal Glossary breaks down all those confusing terms and acronyms. Jargon be gone!
🪡 How do you keep your binding neat?
I use my bookbinding cradle to line up my holes and avoid punching too far through the pages. Smaller holes give a neater and more secure binding, and I use this thin upholstery thread for a cleaner finish.
🧵 Do I need a sewing machine?
Not necessarily! A basic sewing machine is helpful for making fabric-covered journals, but strong fabric glue can work just as well. If you stick to paper-based journals or folios, you don’t need one at all. I like the sewn look and making fabric-based journals, so I personally use a simple machine (similar to this) that’s lasted me over 10 years – it’s a trusty part of my toolkit.
🖼️ What digital papers do you use?
I use a mix of my own designs and other favourites. You can see examples here. New to digitals? Check out my mega bundle for a big saving on some of my designs or sign up for my Mahalo Clubhouse membership to get brand new digitals sent to you every month.
📜 What’s the best paper for printing digitals?
I use this 100 GSM Presentation Paper for vibrant and high-quality prints.
🖨️ What printer do you recommend?
I love my Epson Ecotank. It’s affordable, reliable and the ink lasts ages. I used to spend £30 a month on ink – now I refill just once or twice a year for under £30. While I haven’t used it myself, some other crafters recommend the HP Instant Ink program.
🖇️ What glues do you use?
My go-tos are Collall All Purpose, Cosmic Shimmer and Beacon 3-in-1. Here’s how I use each one.
📖 What books are best for junk journaling?
I love using second-hand nature and botanical books. Here are some great titles to look for next time you’re thrifting.