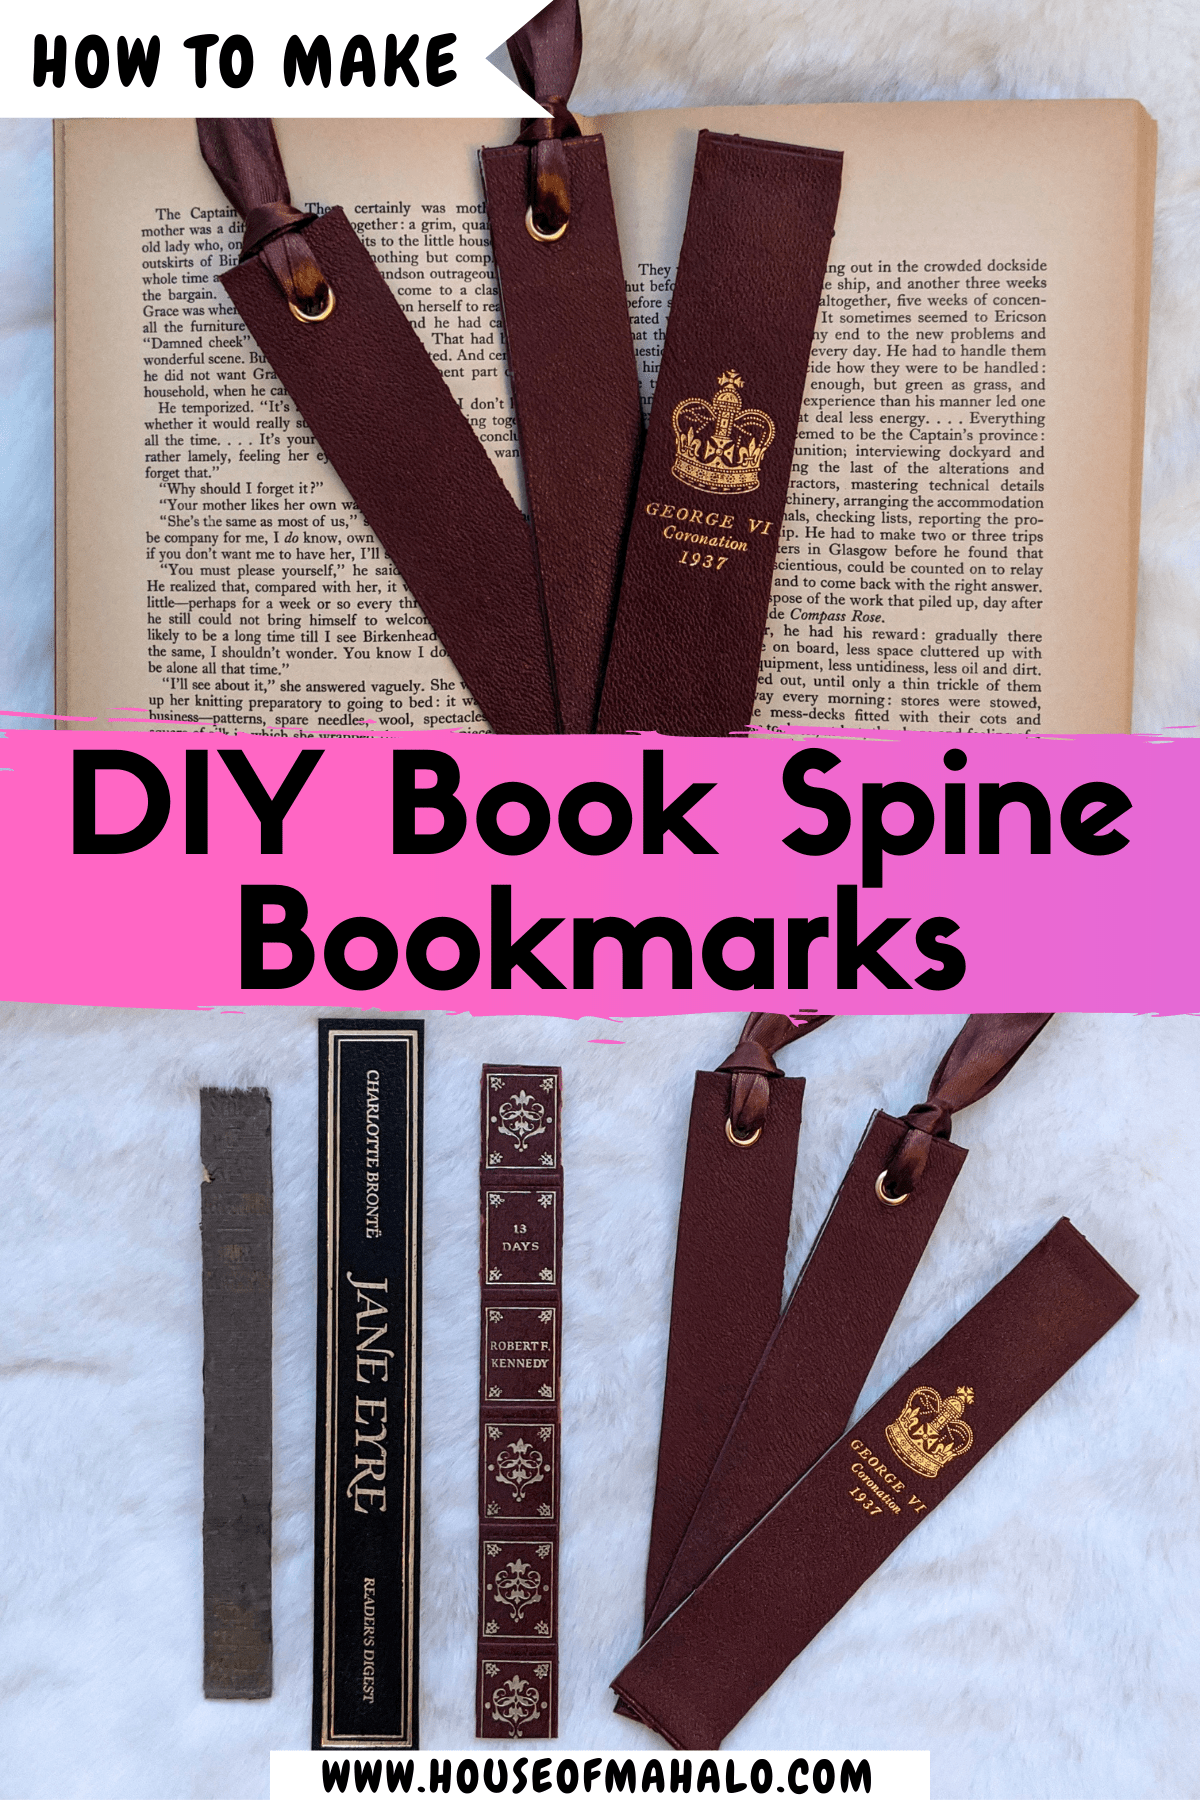
DIY Book Spine Bookmarks – Quick & Easy How To!
Are you a fan of books and reading? Want to know how to make your very own DIY book spine bookmarks? Read on to follow this super easy how-to!
When old books fall apart, it can be difficult to know what to do with them. Since discovering junk journals in early 2021, I now know how to make the best of the entire book.
I can use the pages for collaging with or journaling on. I can use the cover to make a junk journal from scratch. As for the book spines? I love to make gorgeous DIY bookmarks with them.
They’re so easy to make. And the best bit? You’ll be saving yet another discarded book from the landfill!
So, without further adieu, here’s how to make your very own DIY book spine bookmarks…

Supplies You’ll Need:
- A book (preferably one that’s already falling apart!)
- Stiff cardboard (greyboard or cardboard packaging is ideal for this)
- Backing paper
- Craft knife
- Strong, good quality glue (Beacon 3-in-1 is my favourite)
- Sharp, good quality scissors (Tim Holtz shears are my favourite)
- (Optional) Sealer (e.g. Matte Mod Podge)
- (Optional) Eyelets, eyelet setter and some ribbon
Instructions
Step 1. Dismantle your book.
If your book’s spine hasn’t already come away from the cover, then you’ll need to dismantle your book.
Using a craft knife, carefully remove the pages from your book. You can do this by running the craft knife down each side of the book block – just be careful not to go through your cover or spine.
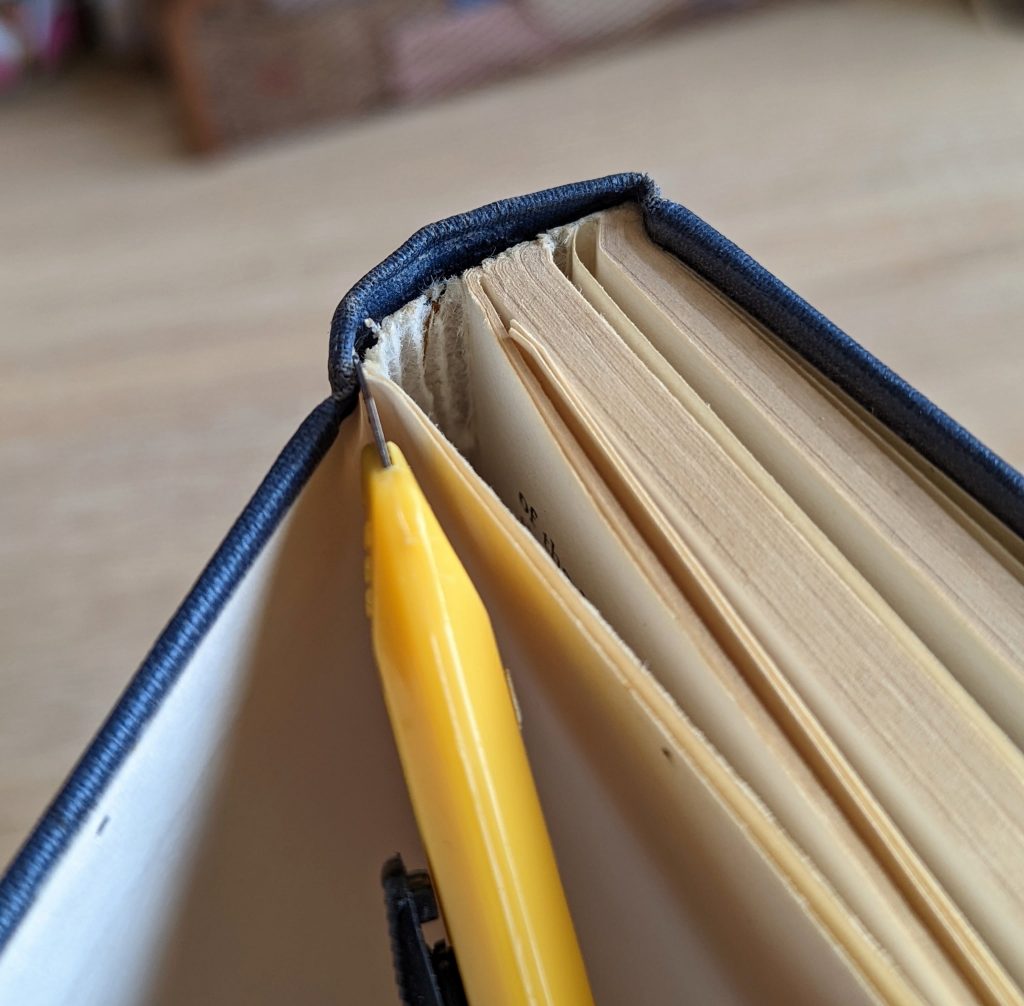
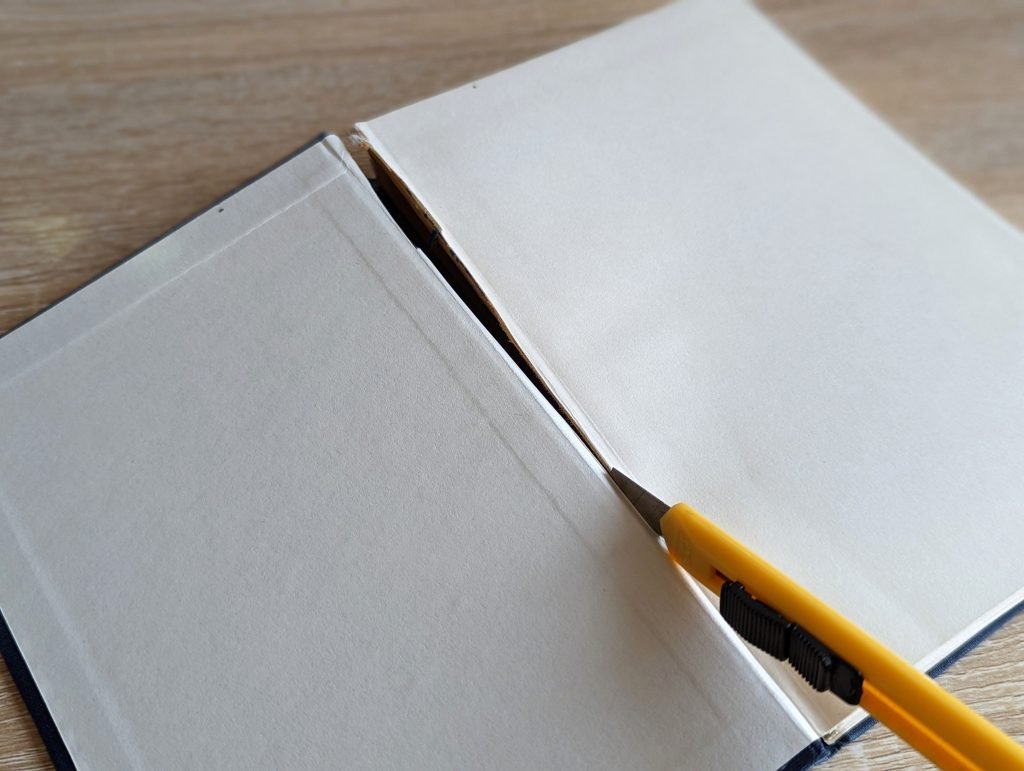
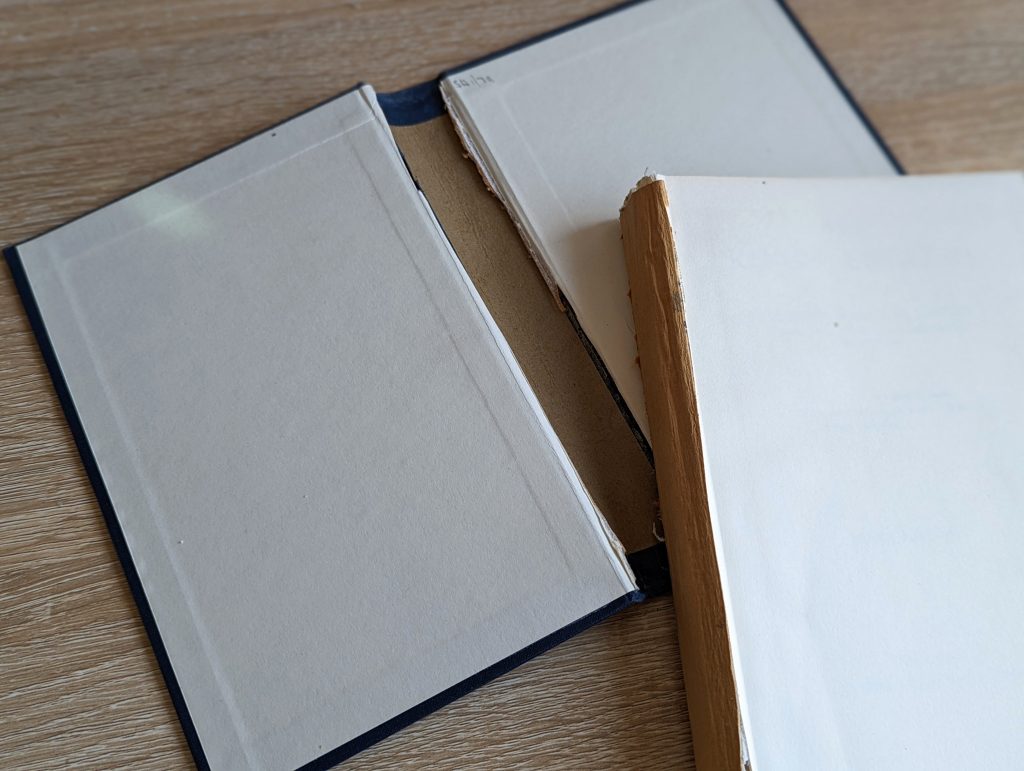
Once you’ve removed the pages, you can now run your craft knife (or scissors) along each side of the book spine itself to remove it from the cover.
Step 2. Tidy up your book spine.
If needed, you may need to tidy up your book spine a little by cutting it down to size or removing frayed edges and the like. You can do this easily with a pair of scissors.
Step 3. Assemble your bookmark.

Using your book spine as a template, cut out a piece of greyboard or cardboard packaging. This is what will give your bookmark some longevity and sturdiness. Do the same with your backing paper.
You could use pretty scrapbook paper, vintage paper or even some paper you’ve painted (I went with gold acrylic paint for most of my bookmarks).
Next, glue your book spine onto your greyboard or cardboard packaging using strong, good quality glue. I like to use Beacon 3-in-1 glue for projects like this.
Then glue your backing paper onto the other side of the cardboard and leave to dry.
This is as simple as it gets!
Step 4. (Optional) Add some finishing touches.
If you like, you could also add an eyelet and some ribbon, twine or lace trim to give your bookmark a more professional, finished look. A Crop-a-Dile eyelet setter should go through these layers fairly easily.
If your book spine is particularly old or delicate, you might also want to add a sealer (such as matte mod podge) to the front of your bookmark.
And hey presto – you’re done! Easy, eh?!

Discover More Easy Upcycling Projects
- Why You (And I!) Should Turn Our Trash Into Treasure
- 21 Genius Ways To Upcycle Old Books
- Easy DIY Secret Storage Book Box
- DIY Antique Writing Folio: Upcycling Old Books Idea [Video]
- Quick & Easy DIY Wrapping Paper Using Book Pages
- How To Make A Junk Journal From Scratch (Step-By-Step)
- Quick & Easy Upcycled Map Coasters
- Quick & Easy DIY Love Map
- How To Make Paper Flowers Using Maps & Book Pages
- Pretty DIY Map Art: 6 Easy Projects You’ll Love Making
- Quick & Easy DIY Key Holder (Using A Picture Frame!)
- Cheap & Easy DIY Dry Erase Board (Using A Large Picture Frame!)
- Easy DIY Apothecary Jars For Halloween [Free Printable]
I’d love to know if you plan on making some of your own DIY book spine bookmarks? Drop me a line in the comments below…
Did you like this quick and easy DIY bookmark tutorial? Why not pin or bookmark this blog post, so you can refer back to it later?
Psst! Why not also come and find me on Instagram @houseofmahalo?!
Junk Journal Toolkit
📦 What do I need to get started?
If you’ve got paper, glue, scissors and something to bind your pages with (like a needle, thread and an awl or pokey tool), you’re good to go! Check out my essentials vs. nice-to-have supply list for more info.
🤯 I’m overwhelmed by tutorials and ideas. Where should I start?
Start with my free Mini Junk Journal Masterclass. It walks you through the process step-by-step. Even though it focuses on a mini journal, the same tips apply to any size journal.
❓ I don’t understand the terminology. Can you help?
Absolutely! My A–Z Junk Journal Glossary breaks down all those confusing terms and acronyms. Jargon be gone!
🪡 How do you keep your binding neat?
I use my bookbinding cradle to line up my holes and avoid punching too far through the pages. Smaller holes give a neater and more secure binding, and I use this thin upholstery thread for a cleaner finish.
🧵 Do I need a sewing machine?
Not necessarily! A basic sewing machine is helpful for making fabric-covered journals, but strong fabric glue can work just as well. If you stick to paper-based journals or folios, you don’t need one at all. I like the sewn look and making fabric-based journals, so I personally use a simple machine (similar to this) that’s lasted me over 10 years – it’s a trusty part of my toolkit.
🖼️ What digital papers do you use?
I use a mix of my own designs and other favourites. You can see examples here. New to digitals? Check out my mega bundle for a big saving on some of my designs or sign up for my Mahalo Clubhouse membership to get brand new digitals sent to you every month.
📜 What’s the best paper for printing digitals?
I use this 100 GSM Presentation Paper for vibrant and high-quality prints.
🖨️ What printer do you recommend?
I love my Epson Ecotank. It’s affordable, reliable and the ink lasts ages. I used to spend £30 a month on ink – now I refill just once or twice a year for under £30. While I haven’t used it myself, some other crafters recommend the HP Instant Ink program.
🖇️ What glues do you use?
My go-tos are Collall All Purpose, Cosmic Shimmer and Beacon 3-in-1. Here’s how I use each one.
📖 What books are best for junk journaling?
I love using second-hand nature and botanical books. Here are some great titles to look for next time you’re thrifting.