Easy DIY Secret Storage Book Box
If you love vintage books as much as I do, then why not make a showpiece out of some of your most unloved books? Read on to find out how you can make a secret storage book box in just one weekend…
I love upcycling. It’s one of my most favourite things to do.
Being able to take something unused and unloved and turn it into something you’ll treasure for many years to come is so rewarding.
For this project, you’ll upcycle used books no one reads anymore, which is way better than them getting sent to landfill or incinerated! Plus, you can also upcycle any old cardboard box for this project as well.
But first, I want to tell you where the inspiration for this project came from.
Celebrating Our Linen Wedding Anniversary With This Secret Storage Book Box
When Scott and I got married, we agreed that we would celebrate each year of marriage with gifts related to the common wedding anniversary milestones.
You know: paper for year one, cotton for year two and so forth.
Well, as of last month, Scott and I have now been married for four loving years.
In honour of that, I wanted to find gifts for him that would fit with the silk and linen themes associated with our fourth wedding anniversary.
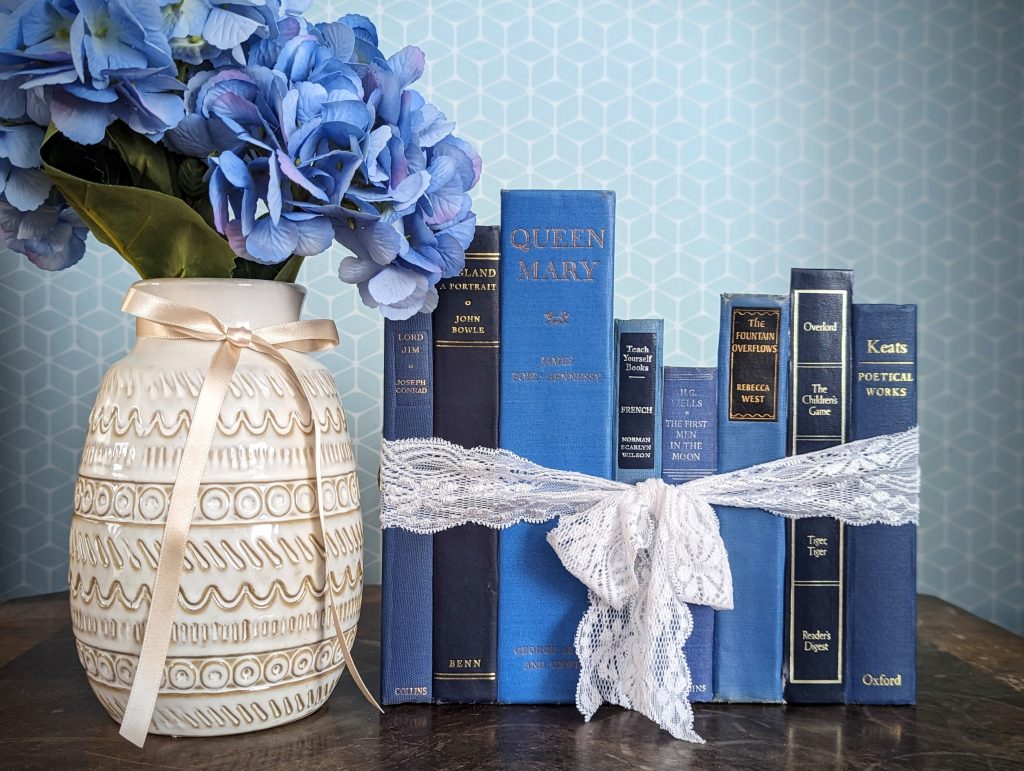
Given I work with books almost every day these days, I knew that many of the vintage books in my stash have linen covers, so I wanted to make something with those.
Naturally, I wanted to focus on blue and gold books to mirror our wedding colour scheme all those years ago.
I’d also recently found the box that my engagement ring got delivered in up in our attic, which I also wanted to upcycle.
And just like that… the idea for this hidden storage book box popped into my head!
Here’s how to make one just like ours…
How To Make A Secret Storage Book Box

Supplies you’ll need:
- Unloved books you’re happy to dismantle
- Cardboard box
- Scrapbook paper or cardstock
- Glue (I always use Beacon 3-in-1 for projects like this)
- Scissors
- Craft knife
- (Optional) Gesso and paint
- (Optional) Embellishments such as lace, buttons, ribbon, etc
Instructions
Step 1: Prepare your cardboard box.
If you’re upcycling a box for this project like I did then you might want to prepare it first – to make it look more decorative inside and to make it easier to work with.
In my case, I had to paint white gesso onto my box as it had a glossy finish (which makes it harder to glue things onto). Gesso dries quickly and also works well as a primer if you want to paint the box.
While you won’t see the front or sides of the box, you will see the inside and the back of it if you turn the box around. This is where paint and decorative paper can come in handy.

I originally wanted to paint my box gold but I wasn’t happy with how it was looking. So I lined the back of the box and all of the inside with scrapbook paper instead. I think it gives it a beautiful finished look.
To do this, you’ll want to glue individual pieces of cardstock onto the back of the box and all of the sides inside (including the bottom of the box).
I like to use Beacon 3-in-1 glue as it’s strong while also giving you “wiggle room” in case you glue things in the wrong place.
Step 2: Prepare your chosen books.
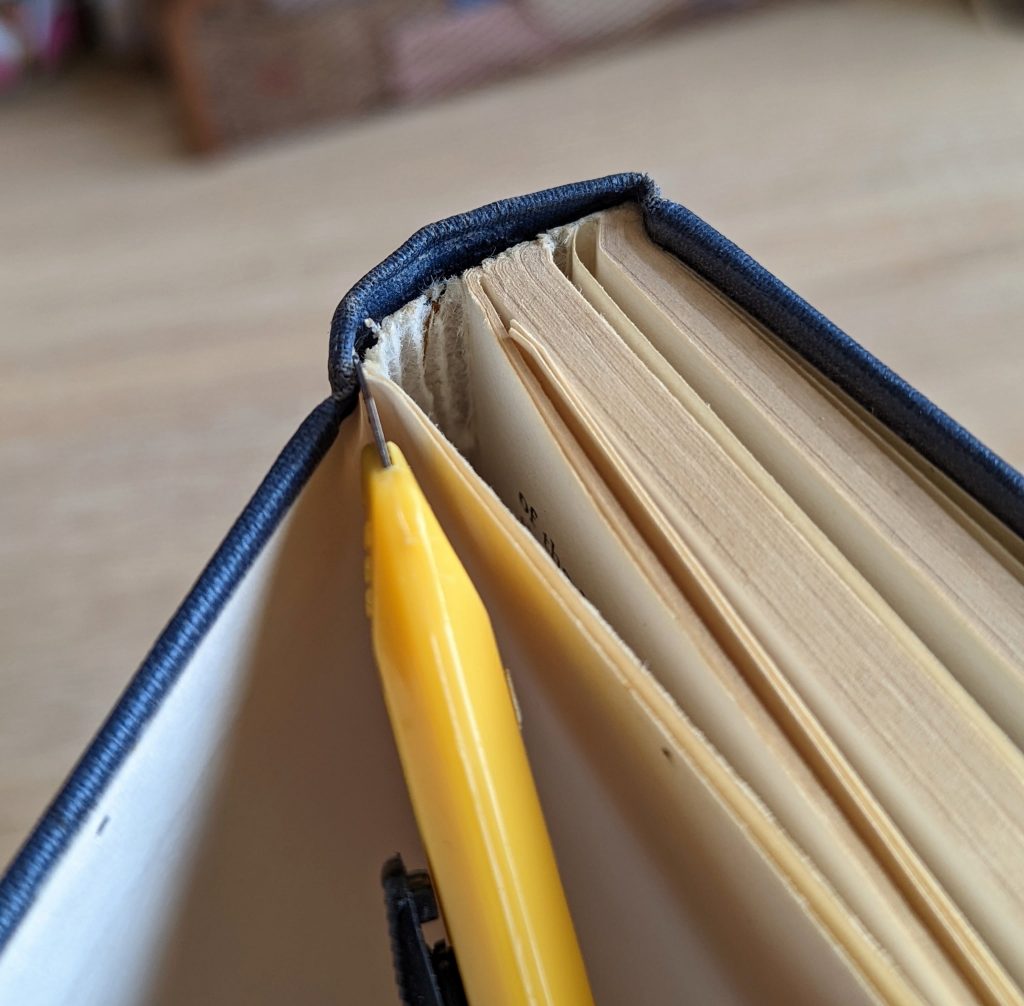
Now you need to dismantle your chosen books.
Start by removing the text blocks from each book cover. You can do this by running a craft knife down each side of the book block to sever it cleanly from the book cover.
But go easy! You don’t want to cut through the spines as you’ll be using those to decorate the box.
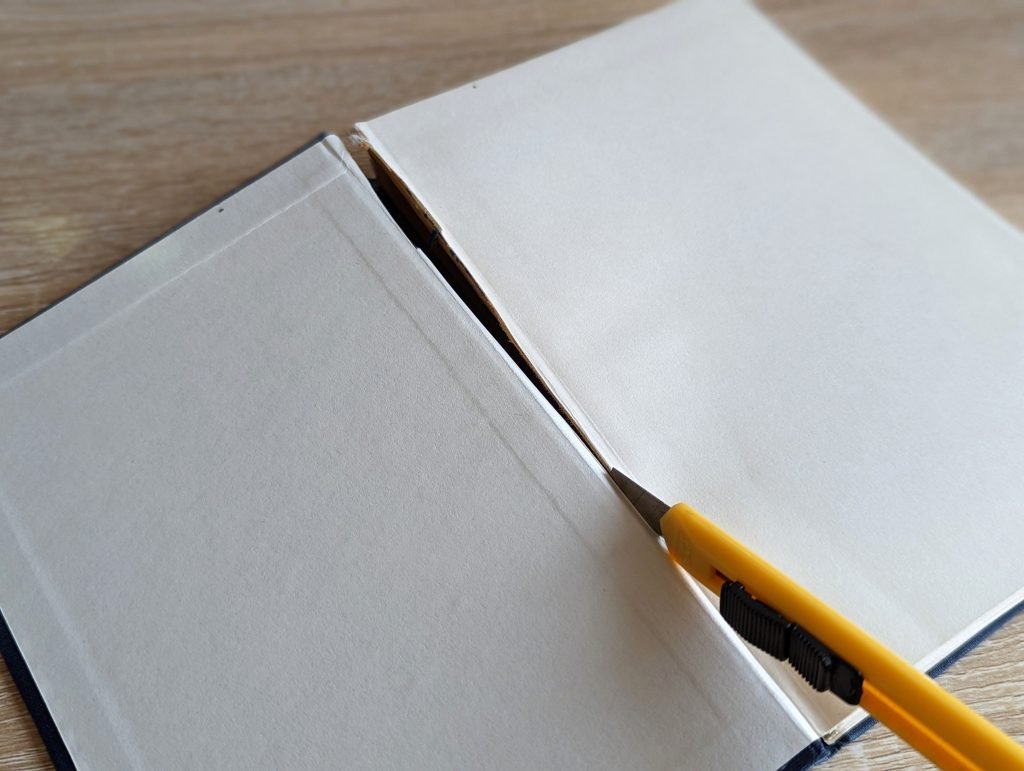
Now you need to decide which books you want to use as the “bookends”, which will decorate either end of the storage box.
For the one on the left, you must keep the back cover and book spine attached. For the one on the right, you need the front cover and book spine attached together.
Using a craft knife and ruler, carefully remove the unwanted part of your book cover from the spine.


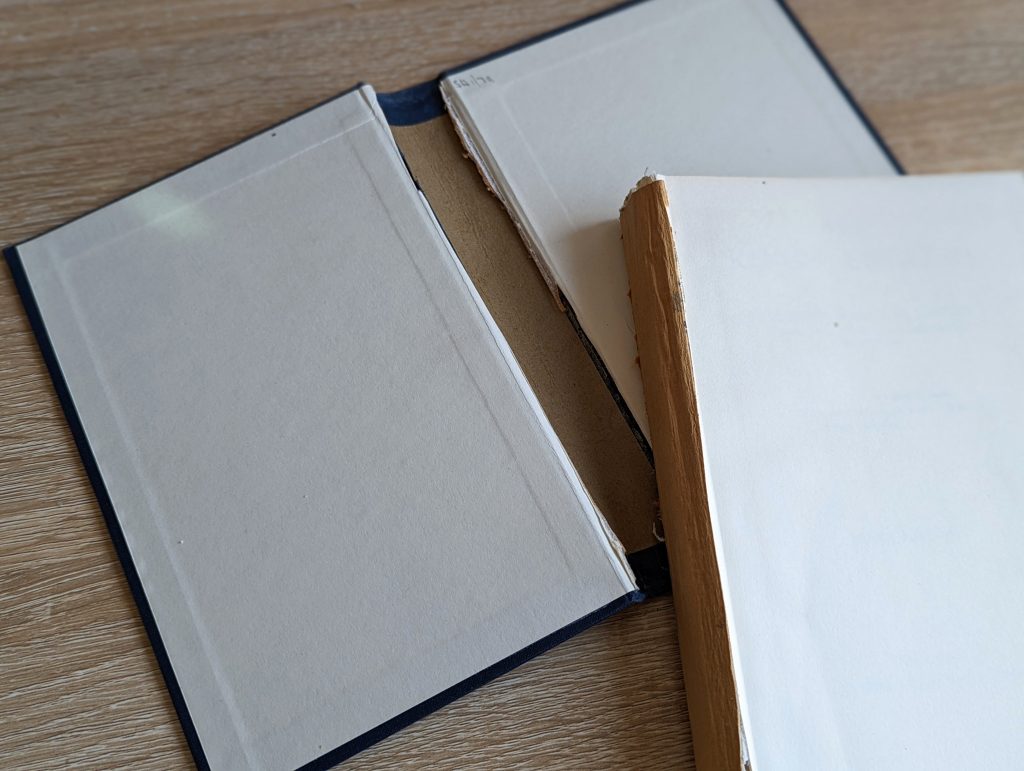
Now you need some more book spines to fill in the gaps. Start by positioning things into place so you know exactly how many you need to cover the front of the box.
Once you know how many book spines you need, use your craft knife and ruler to sever the remaining book spines from their covers.
To help make everything sturdier and prettier, glue some decorative cardstock inside each of the book spines.

You might also want to cover the inside of the “bookend” book covers as you’ll also see those when looking inside the box.

Step 3: Glue the book covers and spines onto the prepared box
Once everything is reinforced and dry, it’s time to start glueing the book covers and book spines onto your cardboard box.
Start with the outer covers first. Remember you’ll need to glue both the book covers and book spines onto the cardboard box. Once again, I prefer to use Beacon 3-in-1 glue for projects like this.

Now you’re ready to glue the book spines along the front of the box.
Remember not to add glue all along your book spines as some of them might peek out above the storage box and you don’t want to see a gluey mess when looking inside it!
Step 4: Add some finishing touches (optional)
If you want to add some finishing touches, then wait until everything is dry so you don’t end up dislodging your carefully placed book spines.
As I was making a home decor piece as a gift for my husband, I decided to tie a pretty lace bow around the box.

I then attached gold star studs (the kind you use to decorate denim) to both sides of the lace – three on each side to represent my lucky number (three) and Scott’s lucky number (six).
And voila – that’s how you can make a beautiful secret storage book box for your home in just one weekend!
Tip: Don’t throw away the discarded book blocks and book covers!
For this project, you’ve probably noticed that you have to discard the book blocks and most of the book covers.
But what kind of upcyclers would we be if we just threw those away?!
There are lots of projects you can make with these discarded items, such as:
- Paper flowers and roses
- Table confetti
- Junk journals and junk journal ephemera
- Writing boards and clipboards
- Book page envelopes
- Book page wrapping paper
- Book page decoupage
Discover More Easy Upcycling Projects
- Why You (And I!) Should Turn Our Trash Into Treasure
- 21 Genius Ways To Upcycle Old Books
- Easy DIY Secret Storage Book Box
- DIY Antique Writing Folio: Upcycling Old Books Idea [Video]
- Quick & Easy DIY Wrapping Paper Using Book Pages
- How To Make A Junk Journal From Scratch (Step-By-Step)
- Quick & Easy Upcycled Map Coasters
- Quick & Easy DIY Love Map
- How To Make Paper Flowers Using Maps & Book Pages
- Pretty DIY Map Art: 6 Easy Projects You’ll Love Making
- Quick & Easy DIY Key Holder (Using A Picture Frame!)
- Cheap & Easy DIY Dry Erase Board (Using A Large Picture Frame!)
- Easy DIY Apothecary Jars For Halloween [Free Printable]
Did you like this hidden storage book box tutorial? Why not pin or bookmark it now, so you can read it again later?

Hi Justine
Thank you for another great idea. We’re in the process of decorating our lounge & I always have a pile of papers etc of things that need to be tackled soon on the box lid at the side of the fireplace. Even when I try to make the pile look neat it always looks untidy & a mess. I can’t wait to get started. Thanks for sharing.
Wonderful! I’m so pleased you want to make one… once I got my head around how to make it, it was really quick and easy. I hope you have fun making yours xoxo